4. Installing Non-Steam Games, Pt. II
Adding Games To Steam
Once you've created your Steam shortcut in Lutris, you'll need to restart Steam for it to show up. The easiest way to do this is to just return to Game Mode, but there's one more thing you may need to do in Desktop Mode before the games will appear in Game Mode.
Missing Steam Links
This usually works on the first try, but I've sometimes had to restart the Deck twice to get the links to show up in Steam.
If they still don't appear, in Lutris, right-click and check to see if the menu says Create Steam Shortcut or Delete Steam Shortcut. If it's the former, then it didn't take the first time and you should try it again.
In Desktop Mode, open Steam > Library and scroll down. You should see the new game under Uncategorized. Right-click > Properties, clean up the name if necessary, and close it (it will automatically save).
Then, click on the game and drag it into the main game area. In the upper left corner, you should see an option for Collections. Continue to drag the game onto that box, and hold down the drag button until a list of Collections appear.
Create a new Collection and call it Steam Deck.
To Be Honest
I am actually not sure if this is necessary just for the game to show up in vanilla SteamOS Game Mode. It will be necessary when it comes to Decky Loader and Game Mode customization, which we can get into later. For now, if you create the Lutris Steam shortcut and the game isn't showing up yet after rebooting back to Game Mode, try this.
Example Of A Game Install
This runs through the entire process, including adding custom artwork (which I'll explain in the Decky Loader section.)
Troubleshooting
Q: I added the game in Lutris and created a Steam Shortcut, but it isn't showing up in Game Mode.
A: Try restarting the entire Deck. Boot into Desktop Mode, open Steam, and confirm that the game is appearing there. If it's listed under Uncategorized, try adding it to an existing collection. Restart.
Q: Okay, I'm seeing the game in Game Mode, but it won't launch.
A: Make sure that Lutris is pointing at the correct game exe. Some games come with an exe that opens a launcher, an exe that opens config options, and an exe that launches straight into the game. Game Mode doesn't handle launchers well, so use the direct-launch exe if possible.
Q: The game launches but the controls won't work.
A: Some games need to be launched, closed, then launched again before Steam Input will "hook". This should only be necessary once. If that doesn't do the trick, open the controller config options and try mapping standard keyboard controls (ie. up/down/left/right/enter) and see if the game will accept those.
(I'll expand this section later, just adding this as a placeholder for now.)
Removing Games
Removing a game from your Steam Deck doesn't normally require running an uninstaller, but there are a few steps involved, namely:
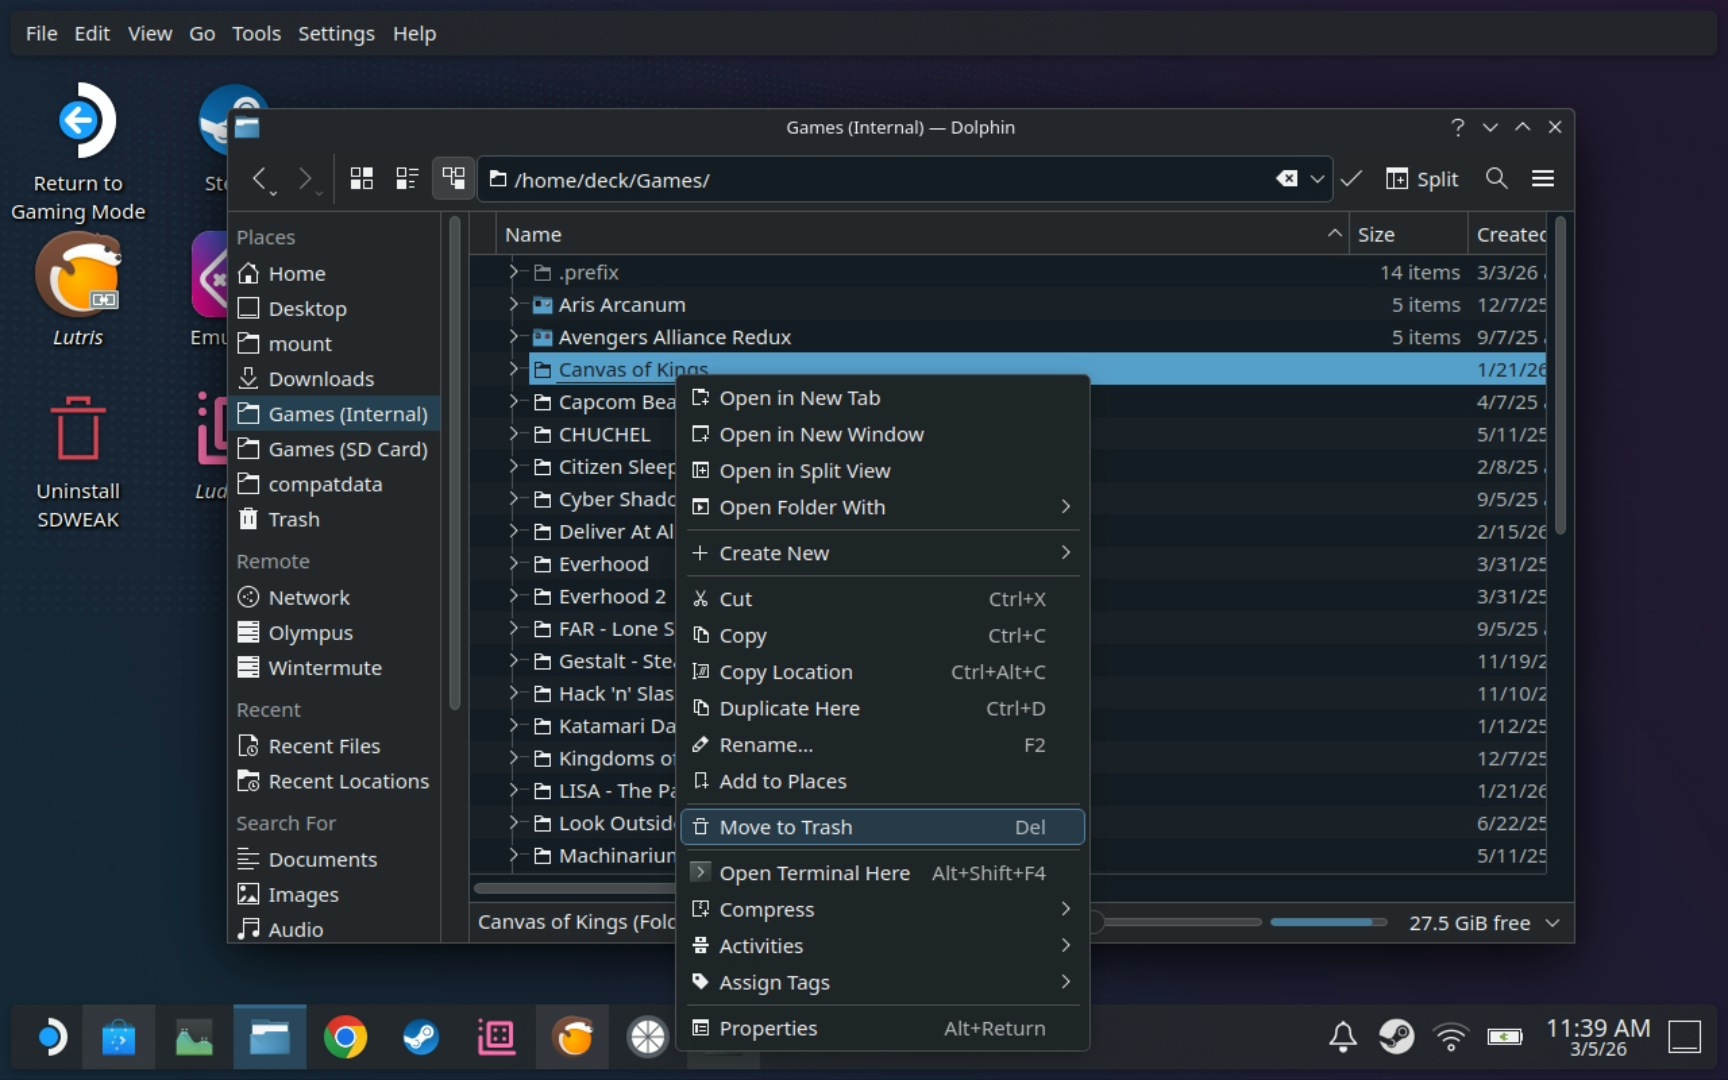
- Delete the game folder from /home/deck/Games.
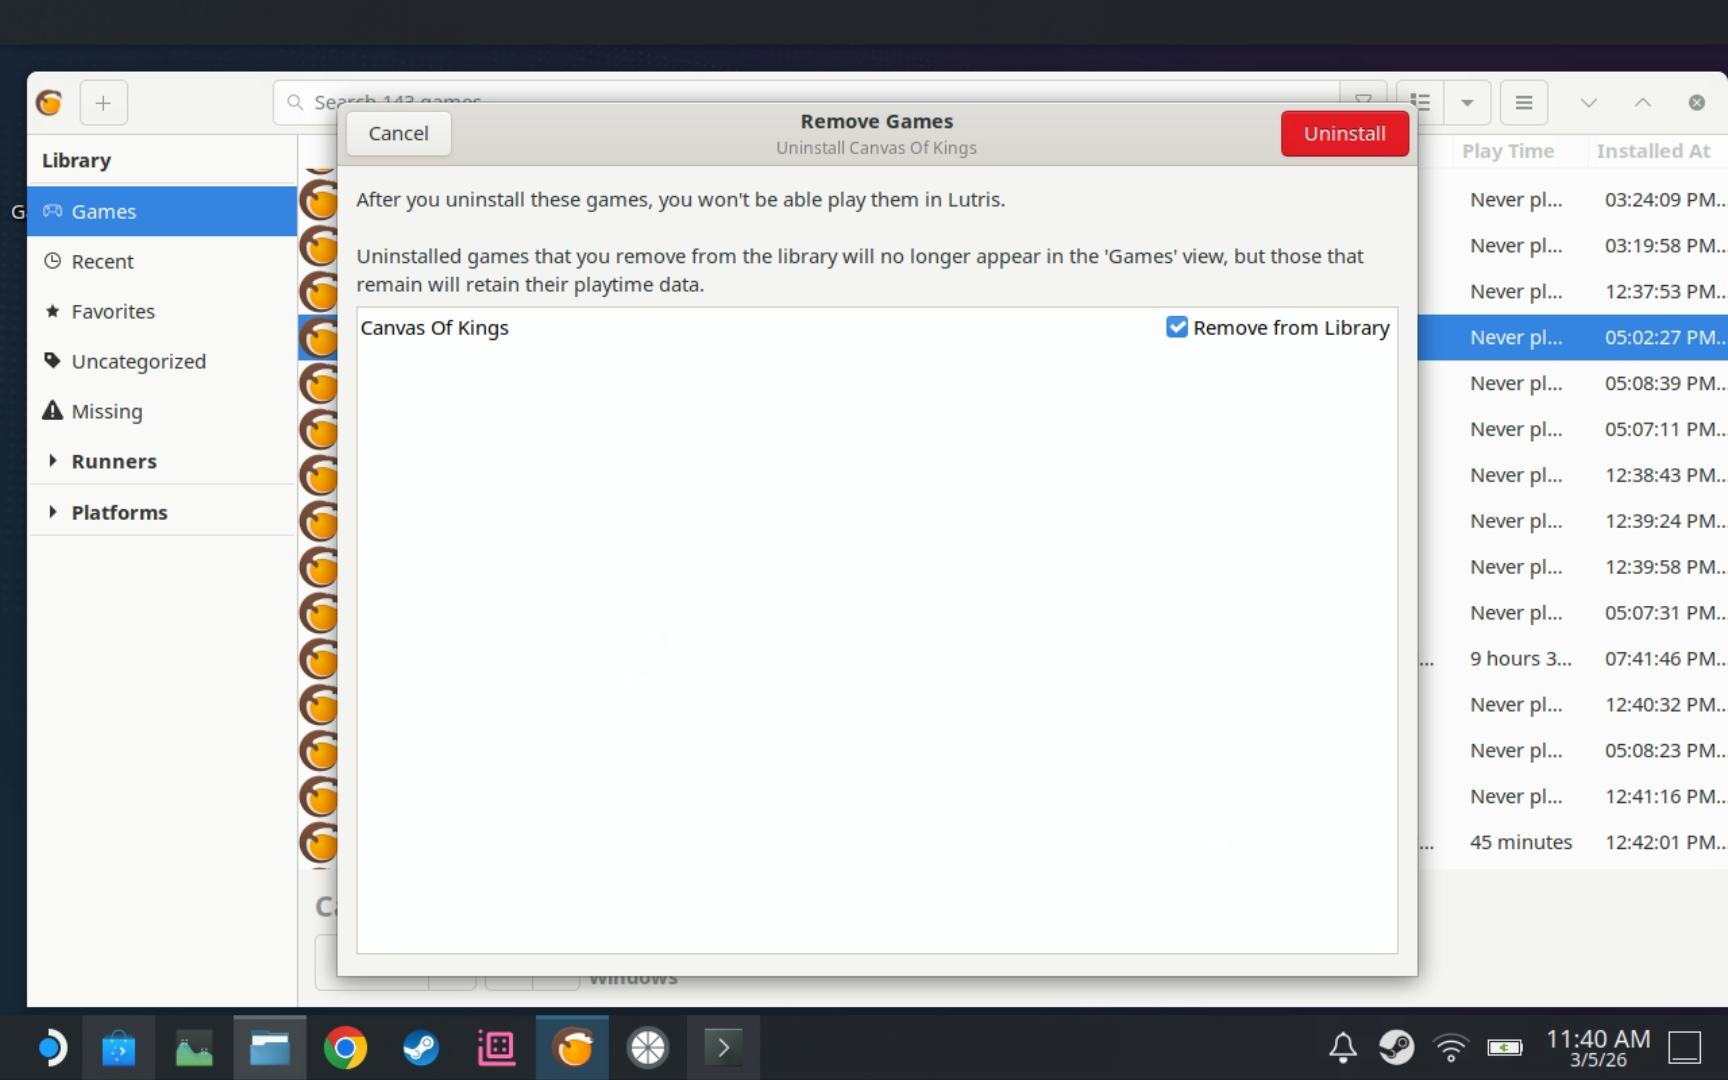
- Lutris: find the game, right-click > Remove > Check the Remove From Library box > Uninstall.
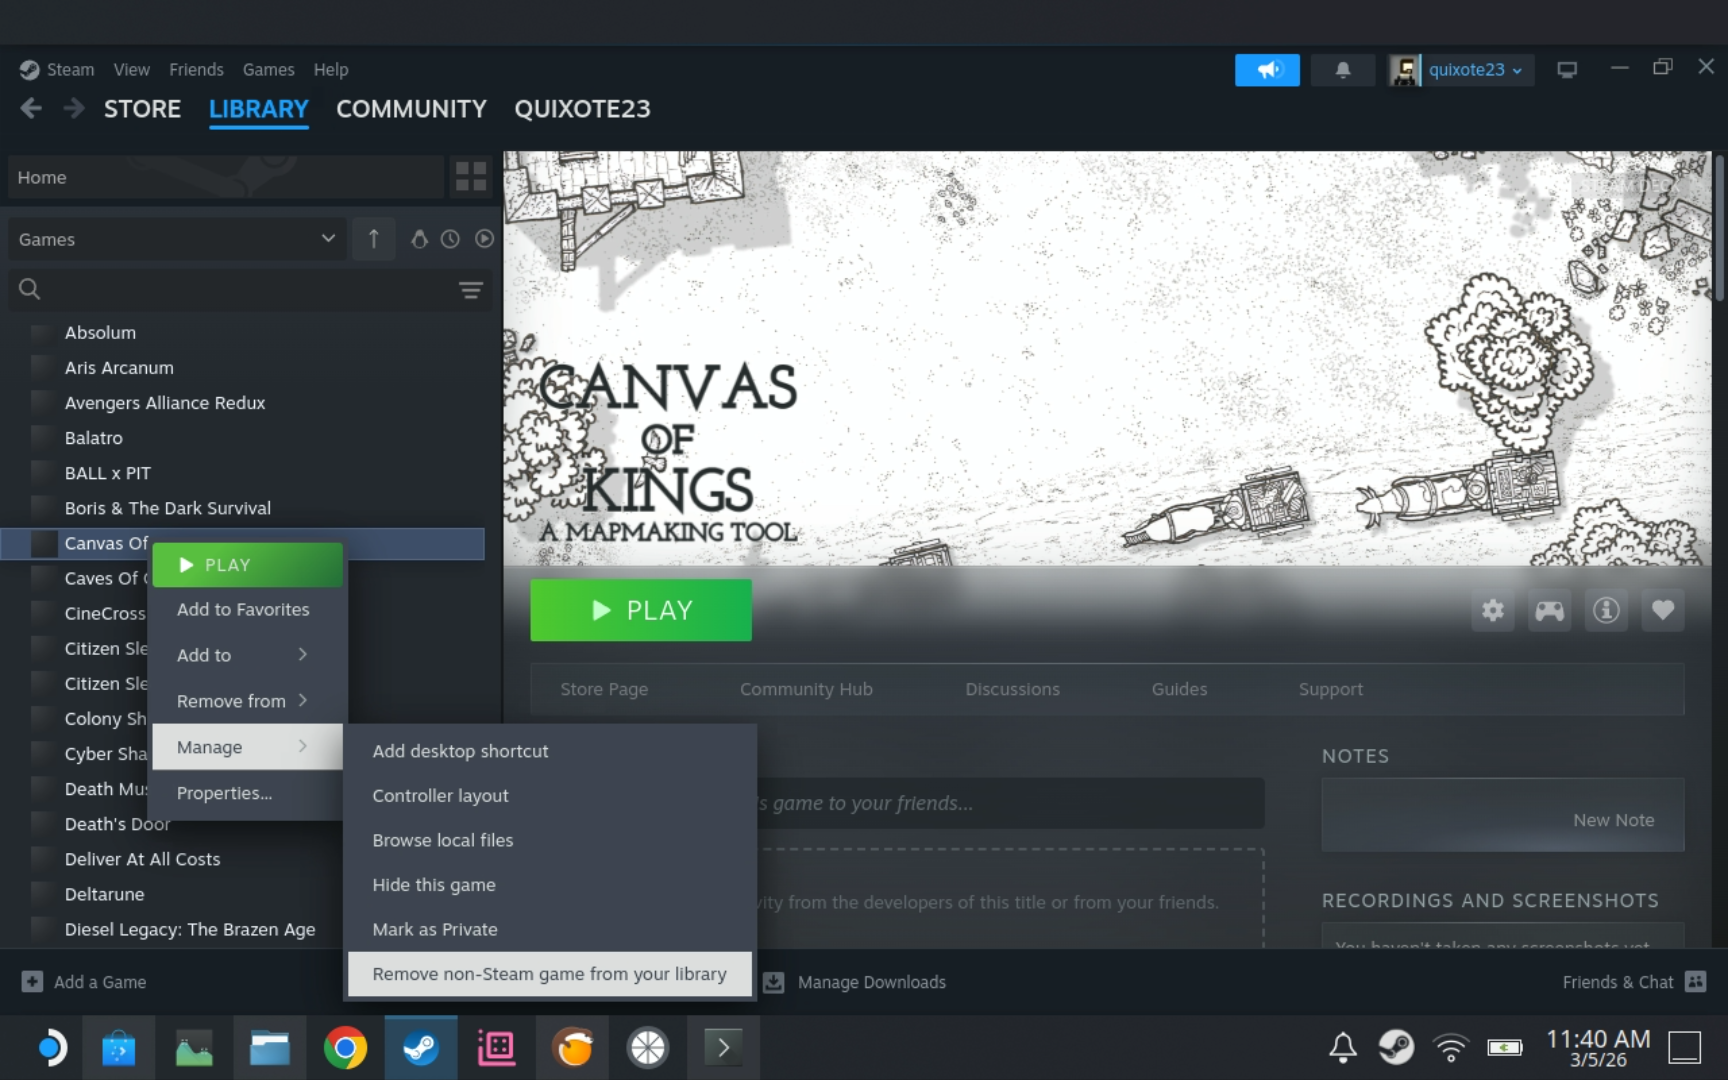
- Steam: find the game, right-click > Manage > Remove Non-Steam Game From Library.
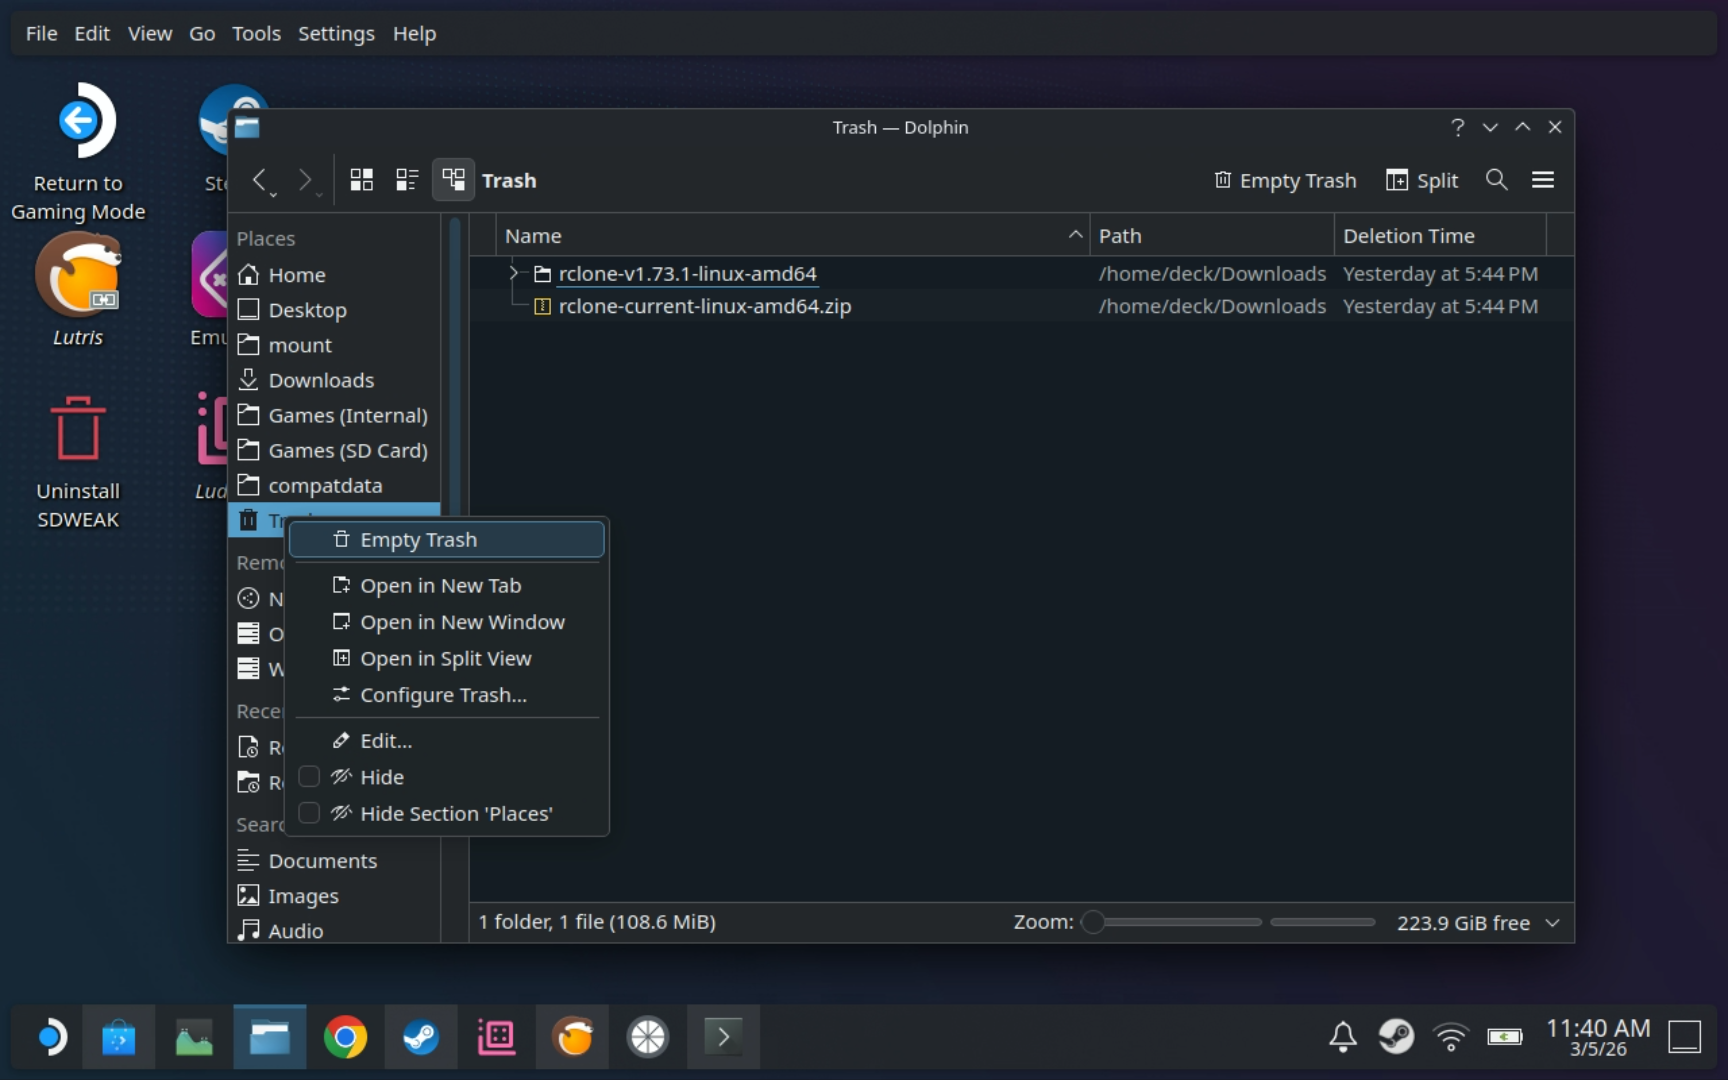
- Right-click on the Trash folder > Empty Trash.
I recommend doing it in the order above, especially if you delete multiple games at once: that way you can check what's in the Trash folder to see what you need to remove in Steam and Lutris before permanently deleting the files.
Step 1: Delete game folder:
Step 2: Remove in Lutris:
Step 3: Remove in Steam:
Step 4: Empty Trash:
Other Tools
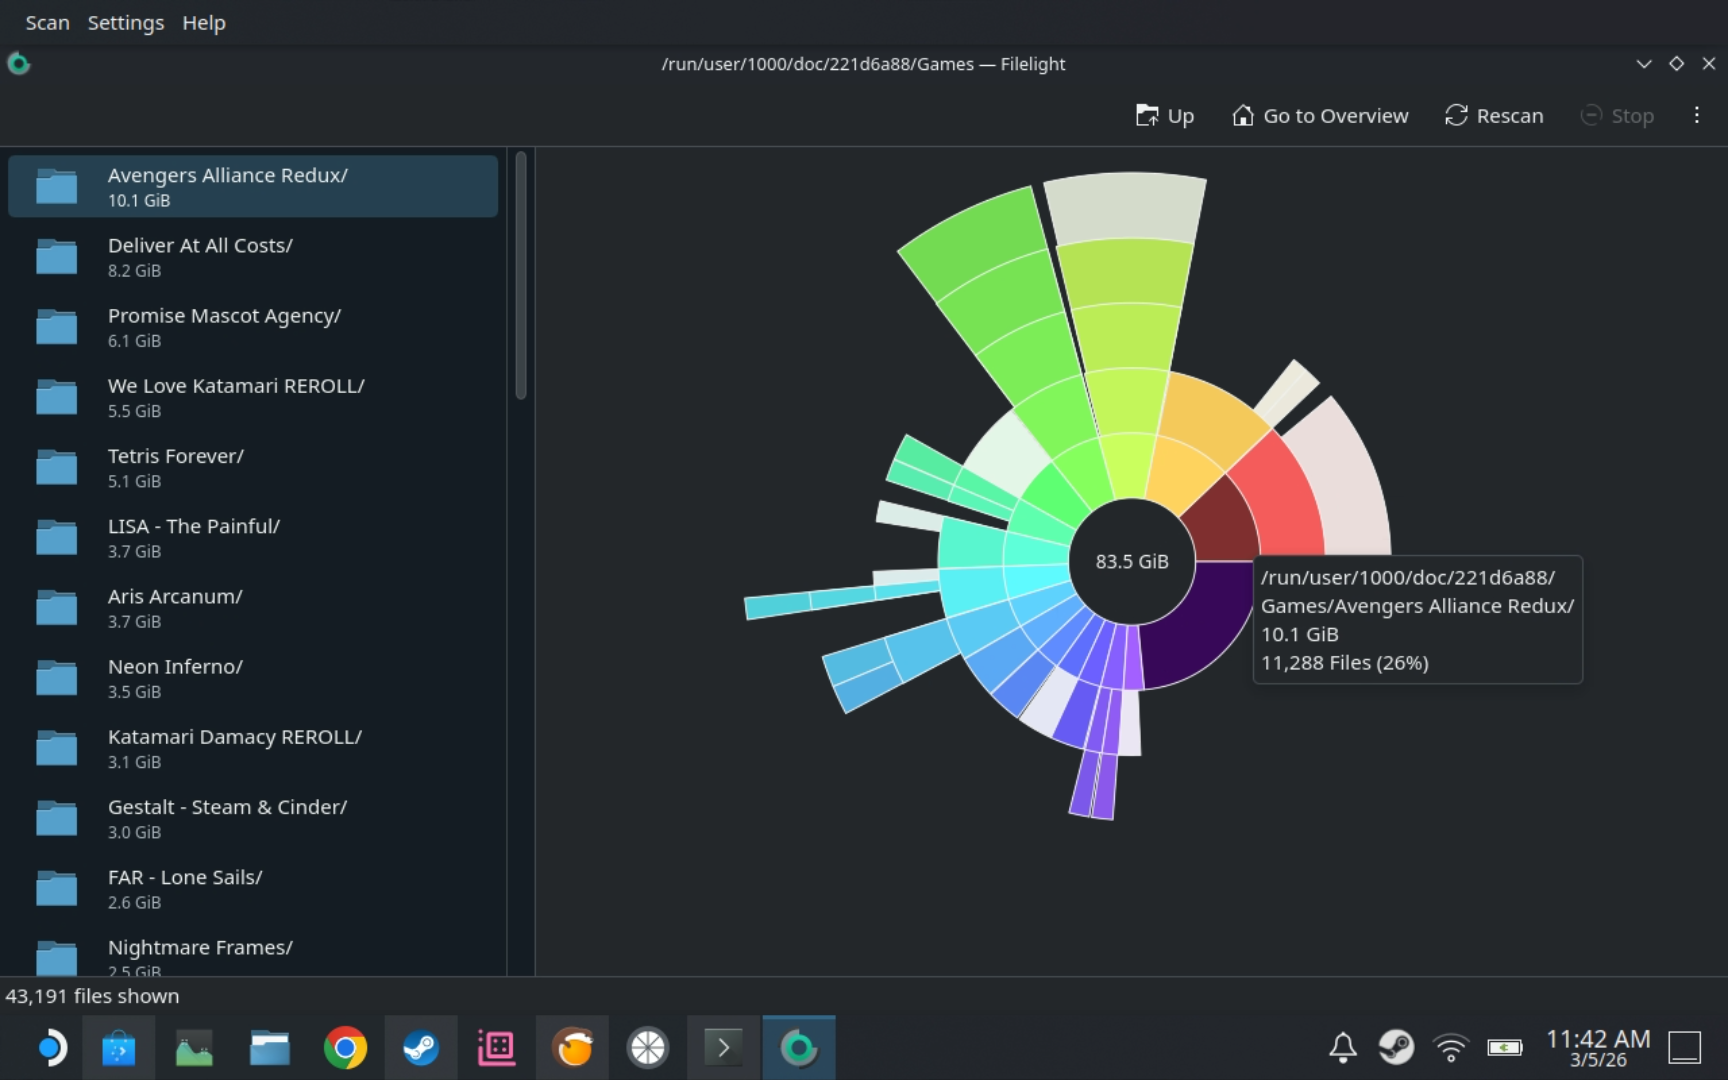
FileLight
You can find a flatpak for FileLight in the Discover store. I recommend this to keep track of your free space, because Linux tends to be a little less forthcoming about that than either Windows or macOS.
Once installed, you can point it at /home/deck/Games and it will tell you which games are consuming the most space.
Ludusavi
This is entirely optional but something I recommend for peace of mind when it comes to your saved games. Steam natively offers cloud save storage, but since we're talking about non-Steam games here, that doesn't apply. This is where Ludusavi comes in.
Saved Games
It is worth calling out that saves exist in your Prefix and not in the game folders themselves.
This is another reason why I use a single Prefix path: it makes backing up and restoring saved games much easier to set up in Ludusavi. It also means that if you delete a game and you later want to go back to it, your saves for that game should still exist and get picked up immediately.
You can install Ludusavi from the Discover store.
The idea behind Ludusavi is that it scans your prefix path for saved games, and then lets you back them up to a local folder or a cloud location.
I suggest you start off with a local backup first:
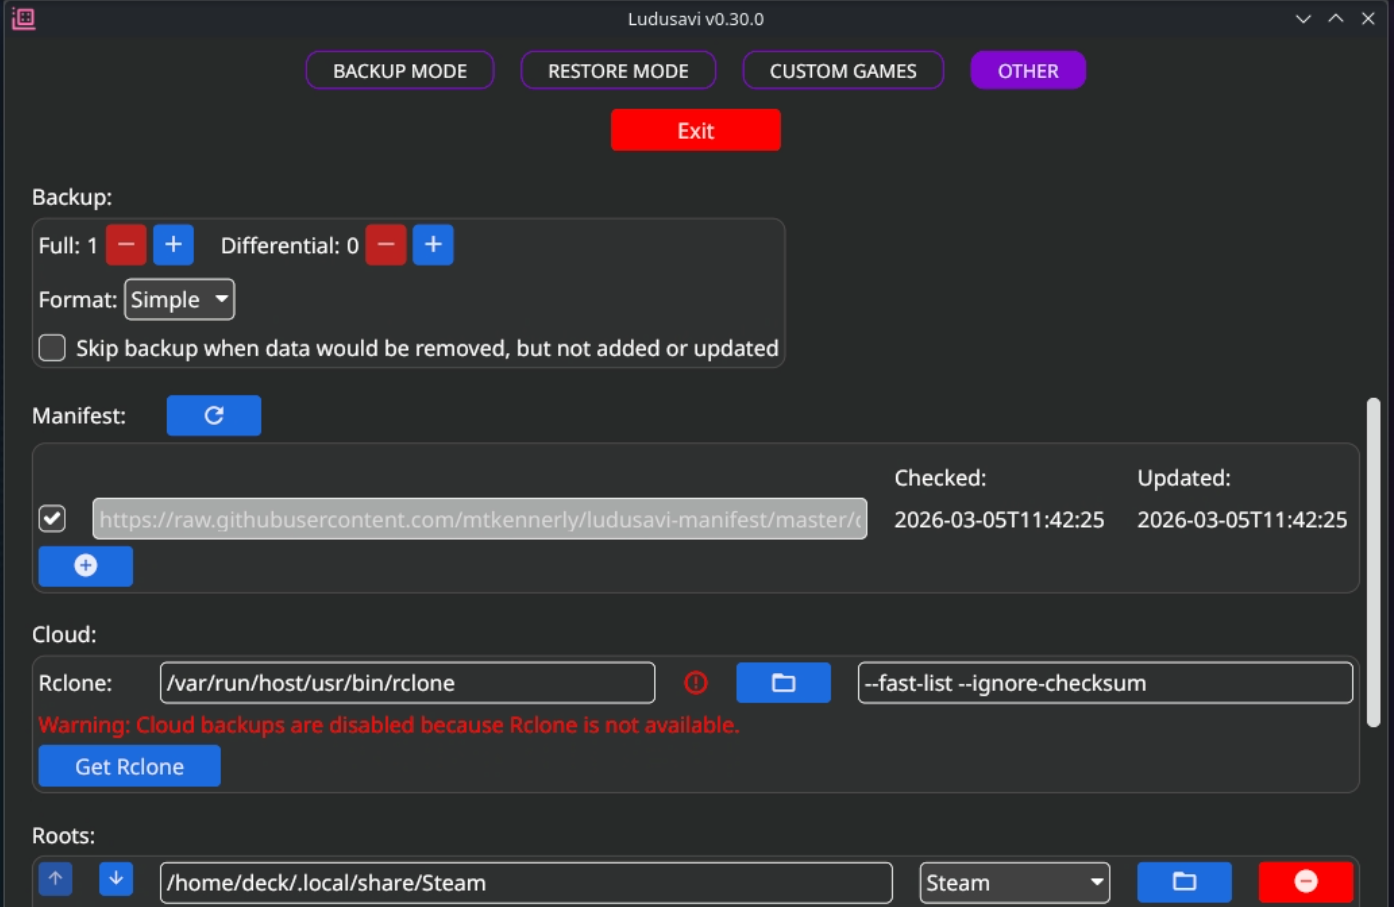
- Click on the Other tab.
- Backup:
- Full: 1 and Differential: 0
- Format: Simple
- Manifest:
- This should be already populated. If not, it should be set to: https://raw.githubusercontent.com/mtkennerly/ludusavi-manifest/master/data/manifest.yaml
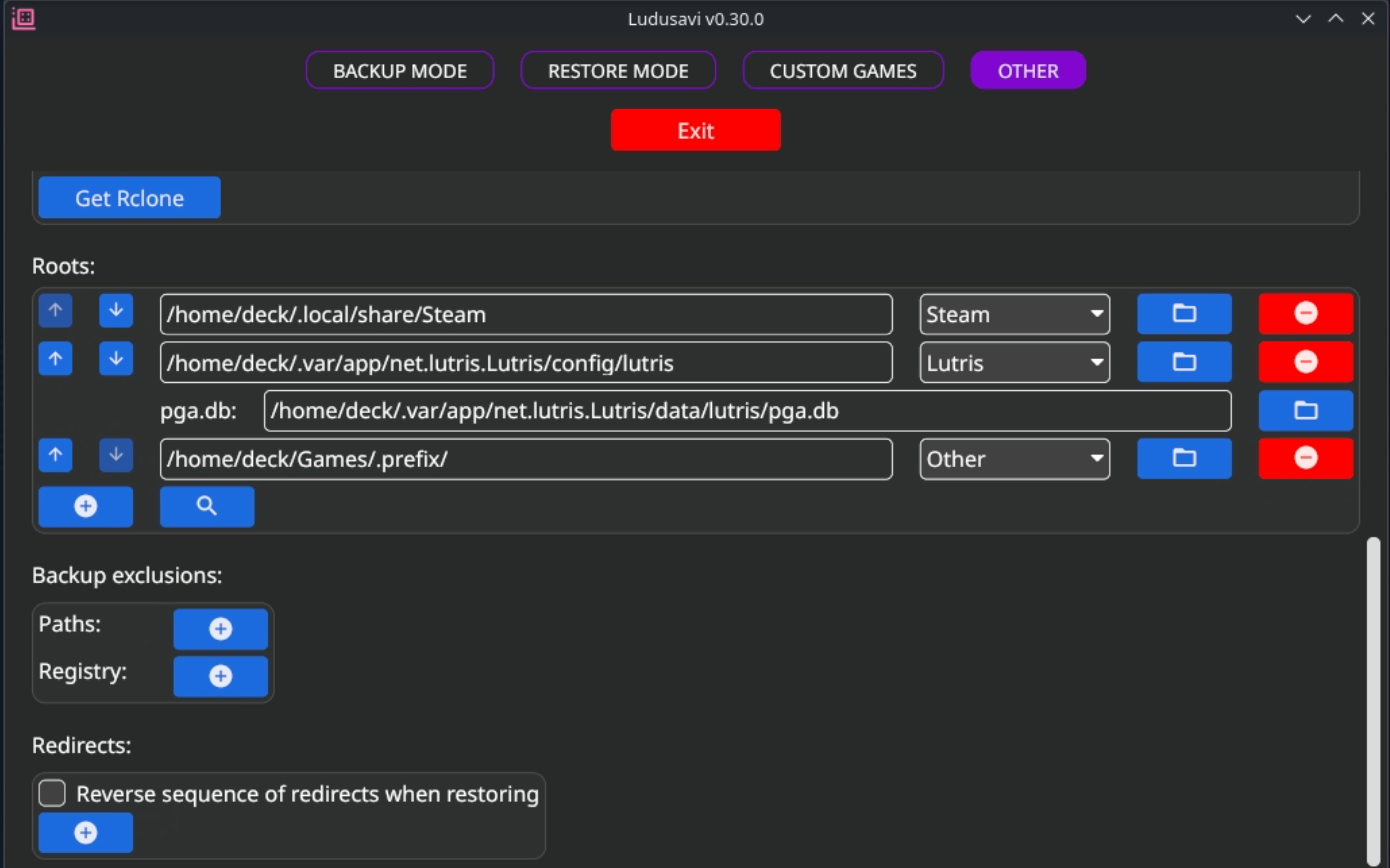
- Roots: You want to add three roots here:
- /home/deck/Games/.prefix > Type: Other
- /home/deck/.local/share/Steam > Type: Steam
- /home/deck/.var/app/net.lutris.Lutris/config/lutris > Type: Lutris
- Backup:
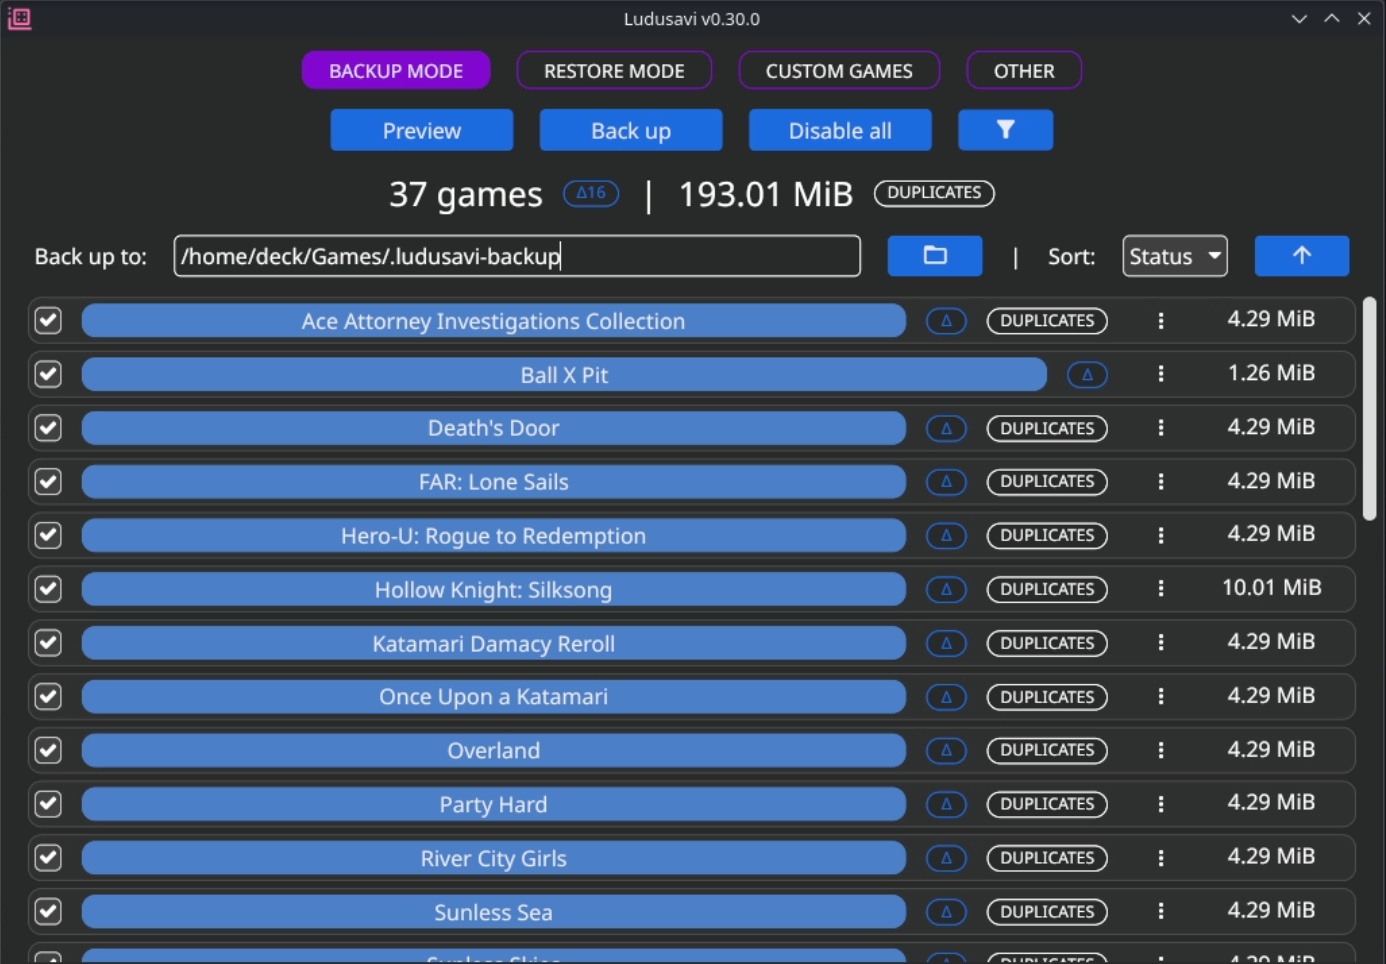
- Click on the Backup Mode tab.
- Back Up To:
- Enter the local path you want to save to (ie. /home/deck/Games/.ludusavi-backup).
- Click on Preview. Ludusavi will scan your root folders and compile a list of game saves to back up.
- Click on Back Up.
- Back Up To:
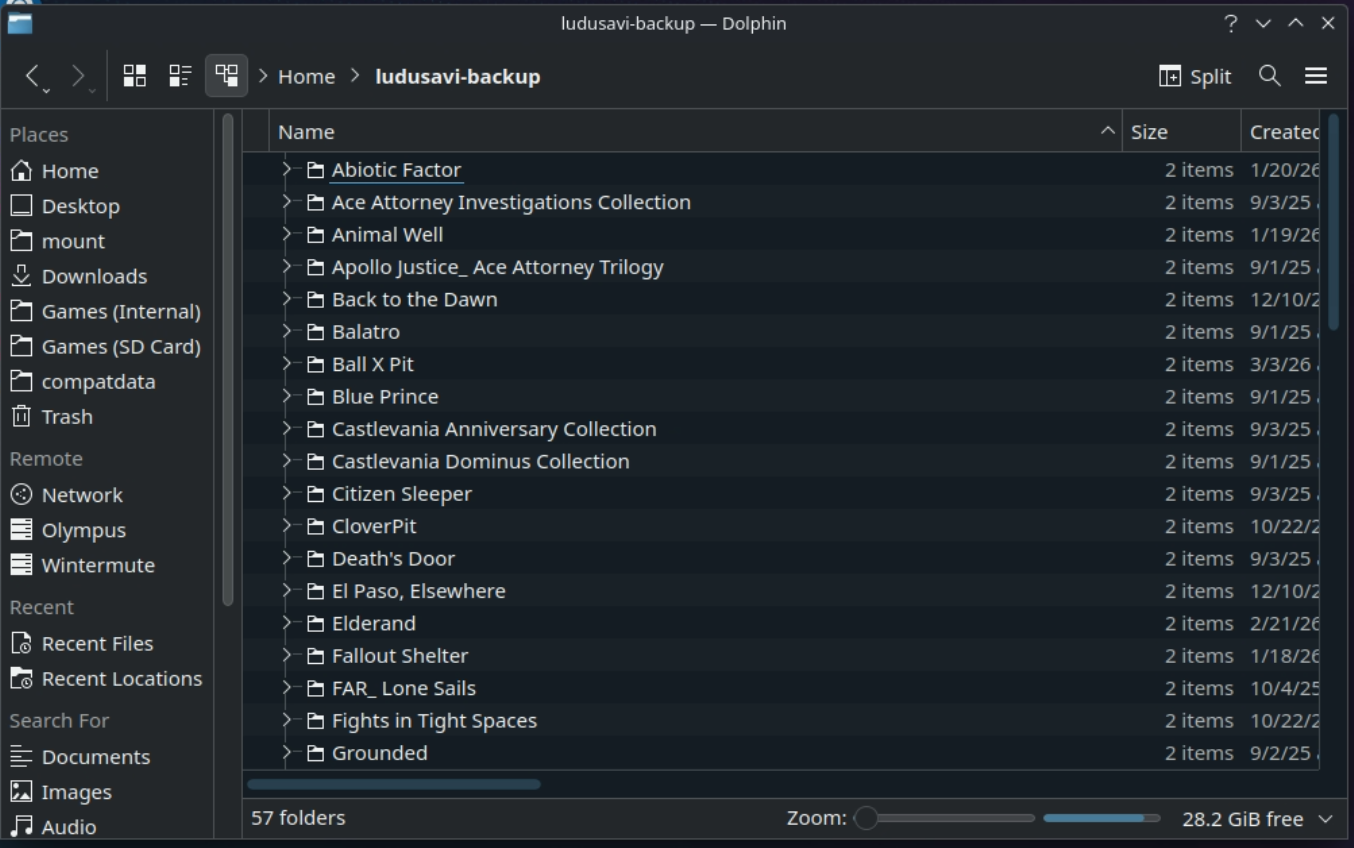
Once this finishes, check /home/deck/Games/.ludusavi-backup to confirm that your backup worked. You should see a list of game folders here.
Ludusavi Settings #1:
Ludusavi Settings #2:
Ludusavi Preview:
The Actual Ludusavi Save-Game Backups:
Of course, this only works on-demand - Ludusavi doesn't regularly run automatic backups on its own.
Scheduling Ludusavi Backups
This part can be tricky, but this is what worked for me. Open Konsole and run these commands:
(Type in your password and press Enter.)
This will open a text file in Linux' text editor Nano. Copy this in:
[Unit]
Description=Ludusavi game save backup

[Service]
Type=oneshot
ExecStart=/usr/bin/flatpak run --command=ludusavi com.github.mtkennerly.ludusavi backup --force
Press Ctrl-O, Enter, Ctrl-X to save and exit, then run:
And repeat the above steps, copying in this content and saving:
[Unit]
Description=Run Ludusavi backup periodically

[Timer]
OnBootSec=5min
OnUnitActiveSec=6h
Persistent=true
Unit=ludusavi-backup.service

[Install]
WantedBy=timers.target
Finally, in the terminal, run these commands:
systemctl --user daemon-reload
systemctl --user enable --now ludusavi-backup.timer
systemctl --user list-timers
That will activate the automated backup service. The last command confirms that it worked - if you did everything right, it should list ludusavi-backup as a timer.
Backups
This is a local backup only, so if you do, say, a factory reset on your Steam Deck without copying this off first, it'll get wiped out.
You might want to change the Format from Simple to Zip in the Ludusavi settings: this then creates a single-file backup that is easier to copy to Google Drive or iCloud.
Ludusavi: Cloud Save Config
I was going to detail how to set up cloud saves through Ludusavi, but as it turns out this is an extremely complex process and requires API tokens and such, so I'll skip this for now. .