1. Setup & Optimization
Intro
The key concept that separates the Steam Deck from most other handheld (or any) mainstream console is that in addition to its default Game Mode, it also offers a Desktop Mode.
Game Mode is essentially Steam Big Picture, but adapted for console and controller usage, while Desktop Mode is the Arch Linux "engine" running everything.
Valve gives you full access to both: while they're provisionally locked down, you still have a great deal of control, and as with any Linux system, getting full access is just a matter of knowing the right terminal commands to run.
Here's a quick look at how my Steam Deck is currently set up for day-to-day use in Game Mode:
And in Desktop Mode:
First Things First
Steam Link
Steam Link is a tool that Valve provides to connect remotely to any other machine running Steam, including the Deck. It's intended for game streaming, but it can make working in Desktop Mode a lot easier.
They also make it really hard to download, for some reason, but you can find it here: https://media.steampowered.com/steamlink/windows/latest/SteamLink.zip
Other than making sure you have Steam installed on the Windows device you're running this from, I won't go into how to set this up because it's mostly self-explanatory. Just unzip and install it on Windows, launch it, and if you're on the same network as the Steam Deck, it should find it. You can then connect to it and use your monitor\screen, keyboard and mouse in the Desktop environment.
Steam also has a separate app called Remote Play, which is used exclusively for game-streaming through Steam, mainly for multi-player gaming. I haven't played with it much because it doesn't work great for non-Steam games, but it seems cool.
However, just to complicate things, you may need to go into the Steam settings on both your Windows machine and Steam Deck and enable the Remote Play option for Steam Link to work right.
Other things you might need to know to get Steam Link working:
- Your Steam Deck local IP:
- Game Mode: Steam Button > Settings > Internet > (your network name) > IP Address
- Desktop Mode: Open Konsole and run:
ip route get 1 | awk '{print $7; exit}'
- Port Forwarding:
- You can find a guide on how to forward ports here.
- Steam Link uses UDP ports 27031-27036 and TCP ports 27036-27037.
- It's probably not necessary to do this out-of-the-box, but is useful to know if Steam Link won't connect.
Game Mode is where you'll be configuring and launching your games on a day-to-day basis, but Desktop Mode is where you'll be actually installing games and adding them to Lutris (more on that later). First, though, you need to get your environment set up correctly.
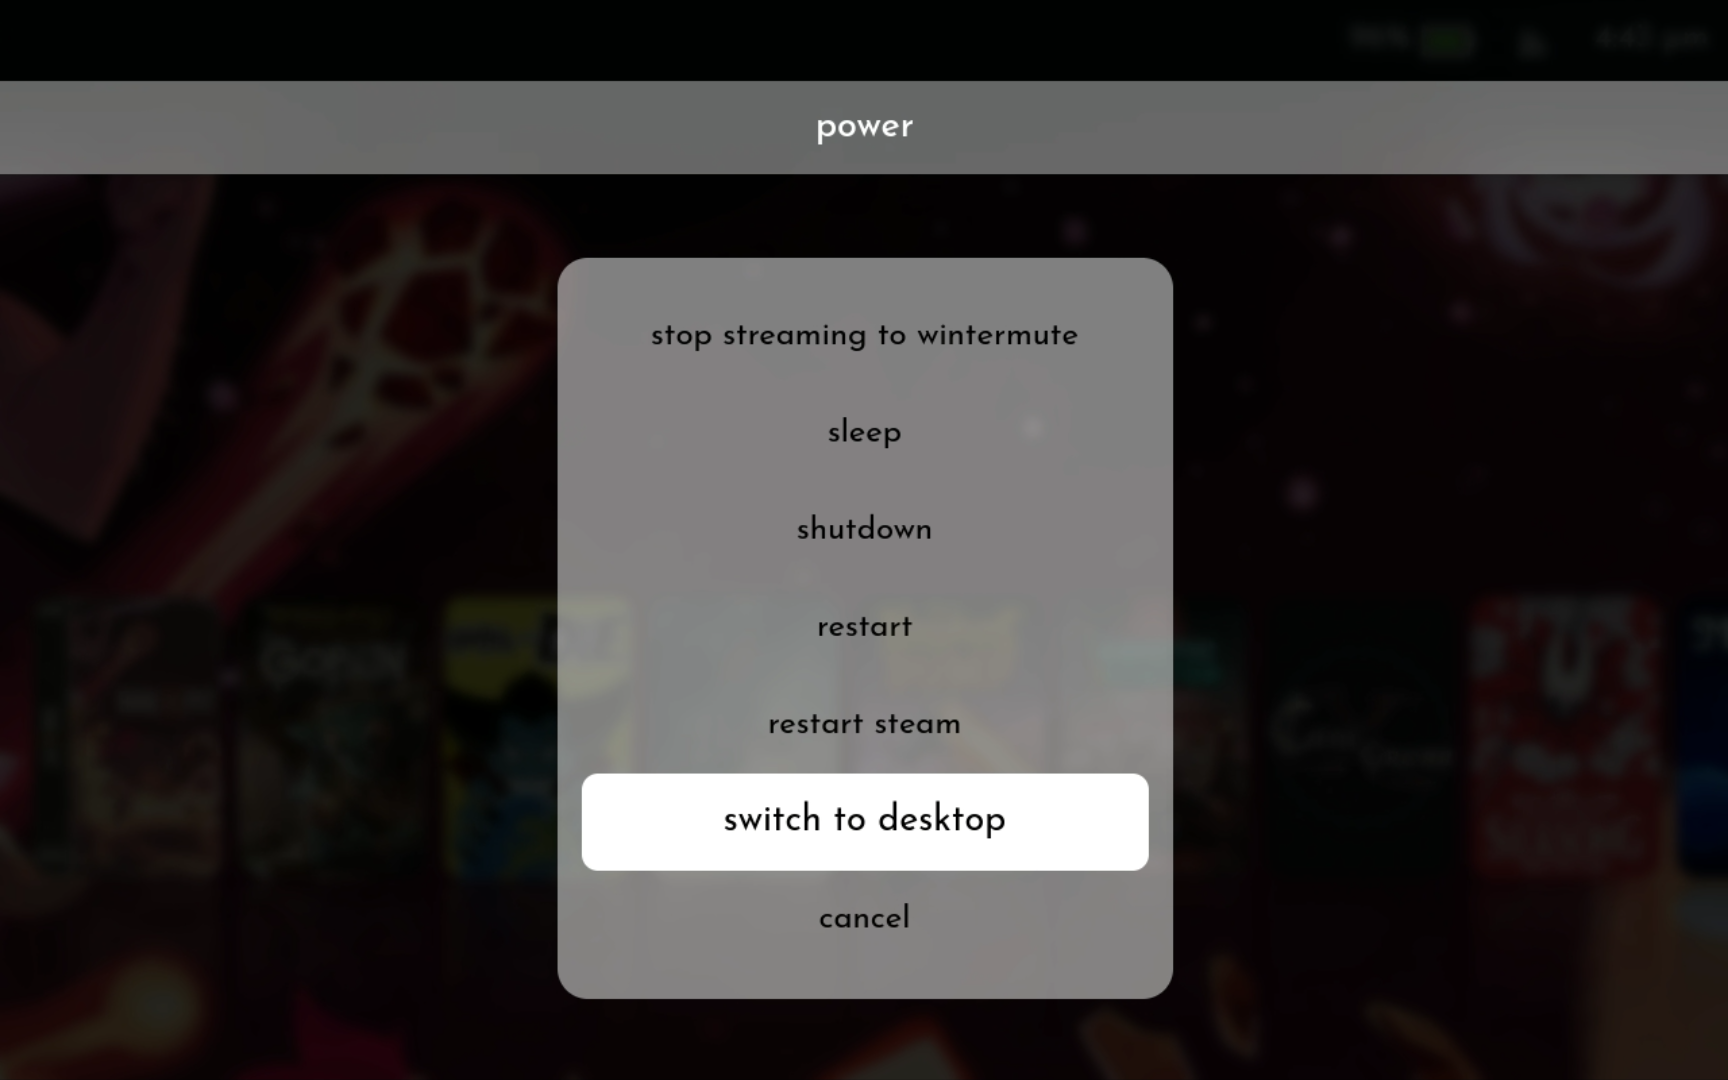
You can get to Desktop Mode by pressing the Steam button > Power > Switch To Desktop:
Once Desktop Mode has loaded, search for Konsole and open it.
Pinning The Terminal
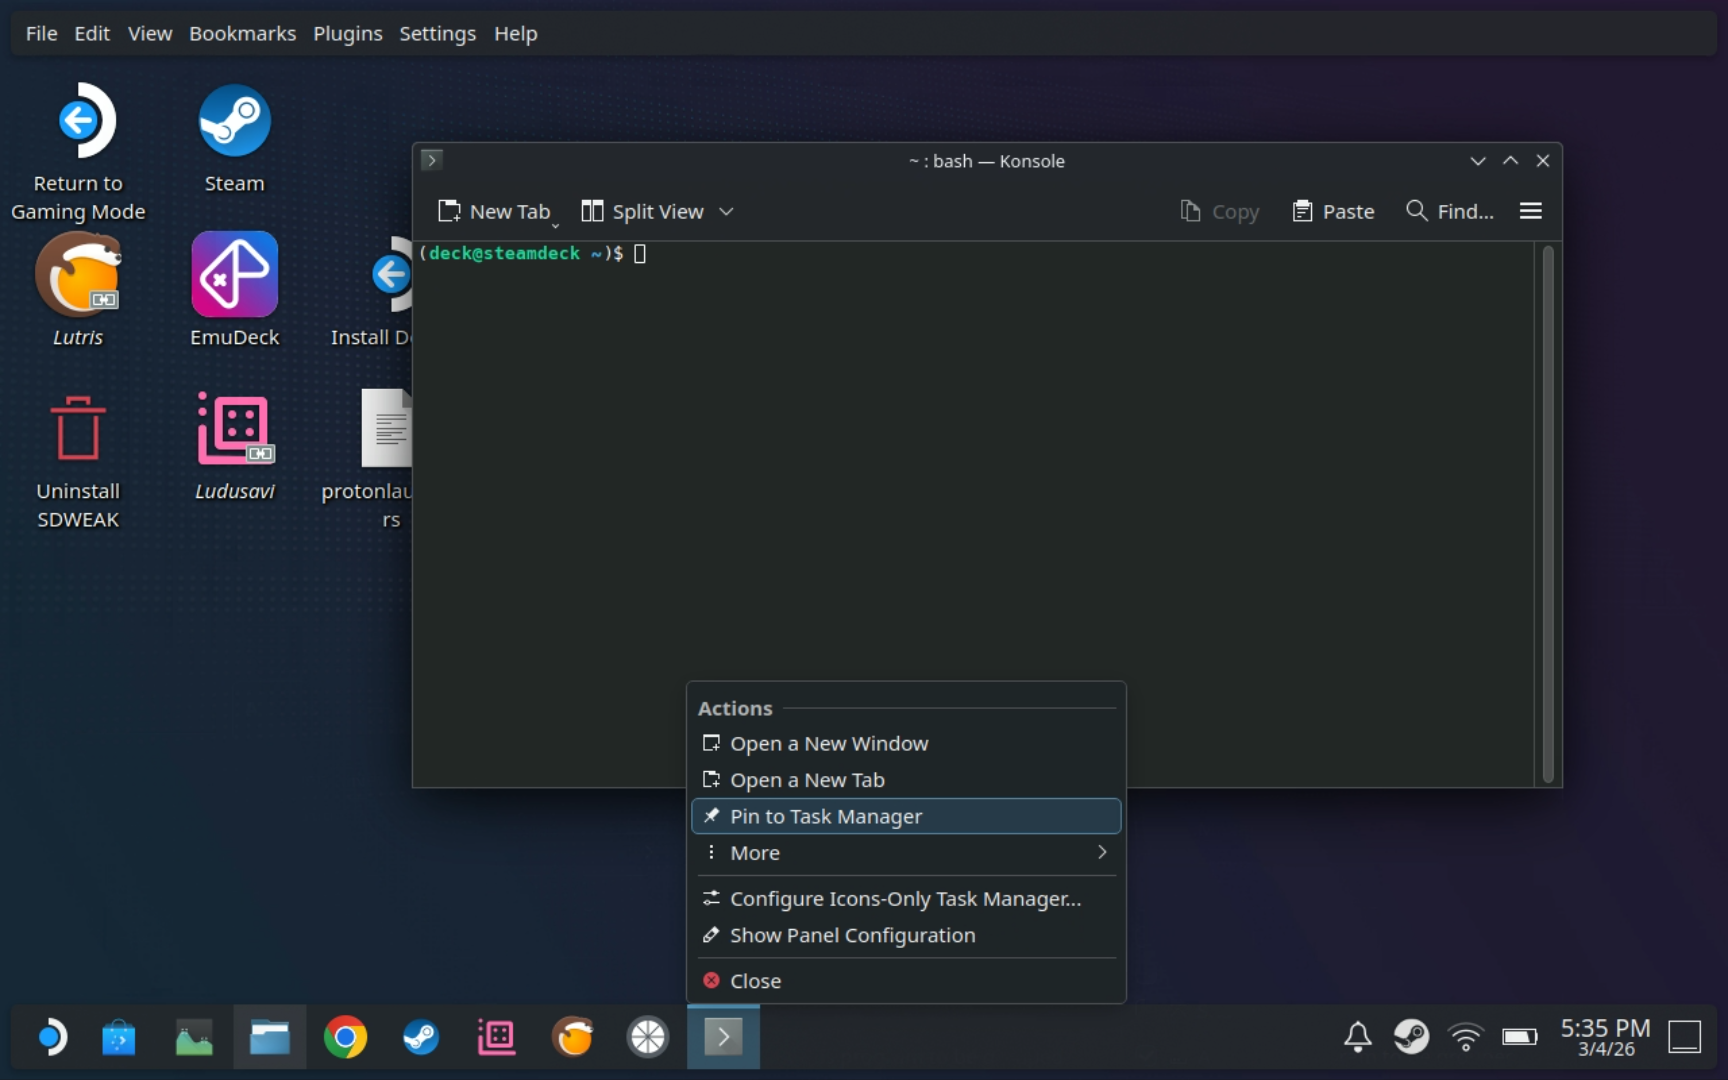
Right-click (probably mapped to the R2 or L2 button) on the Konsole icon in the taskbar and choose Pin To Task Manager for quick terminal access.
In the terminal, run this command to create a root password:
You're going to be prompted for this password a lot, especially during the setup stages, so make it something easy to enter.
I also recommend doing the same thing with Discover, Arch Linux's flatpak app store.
Return To Gaming Mode
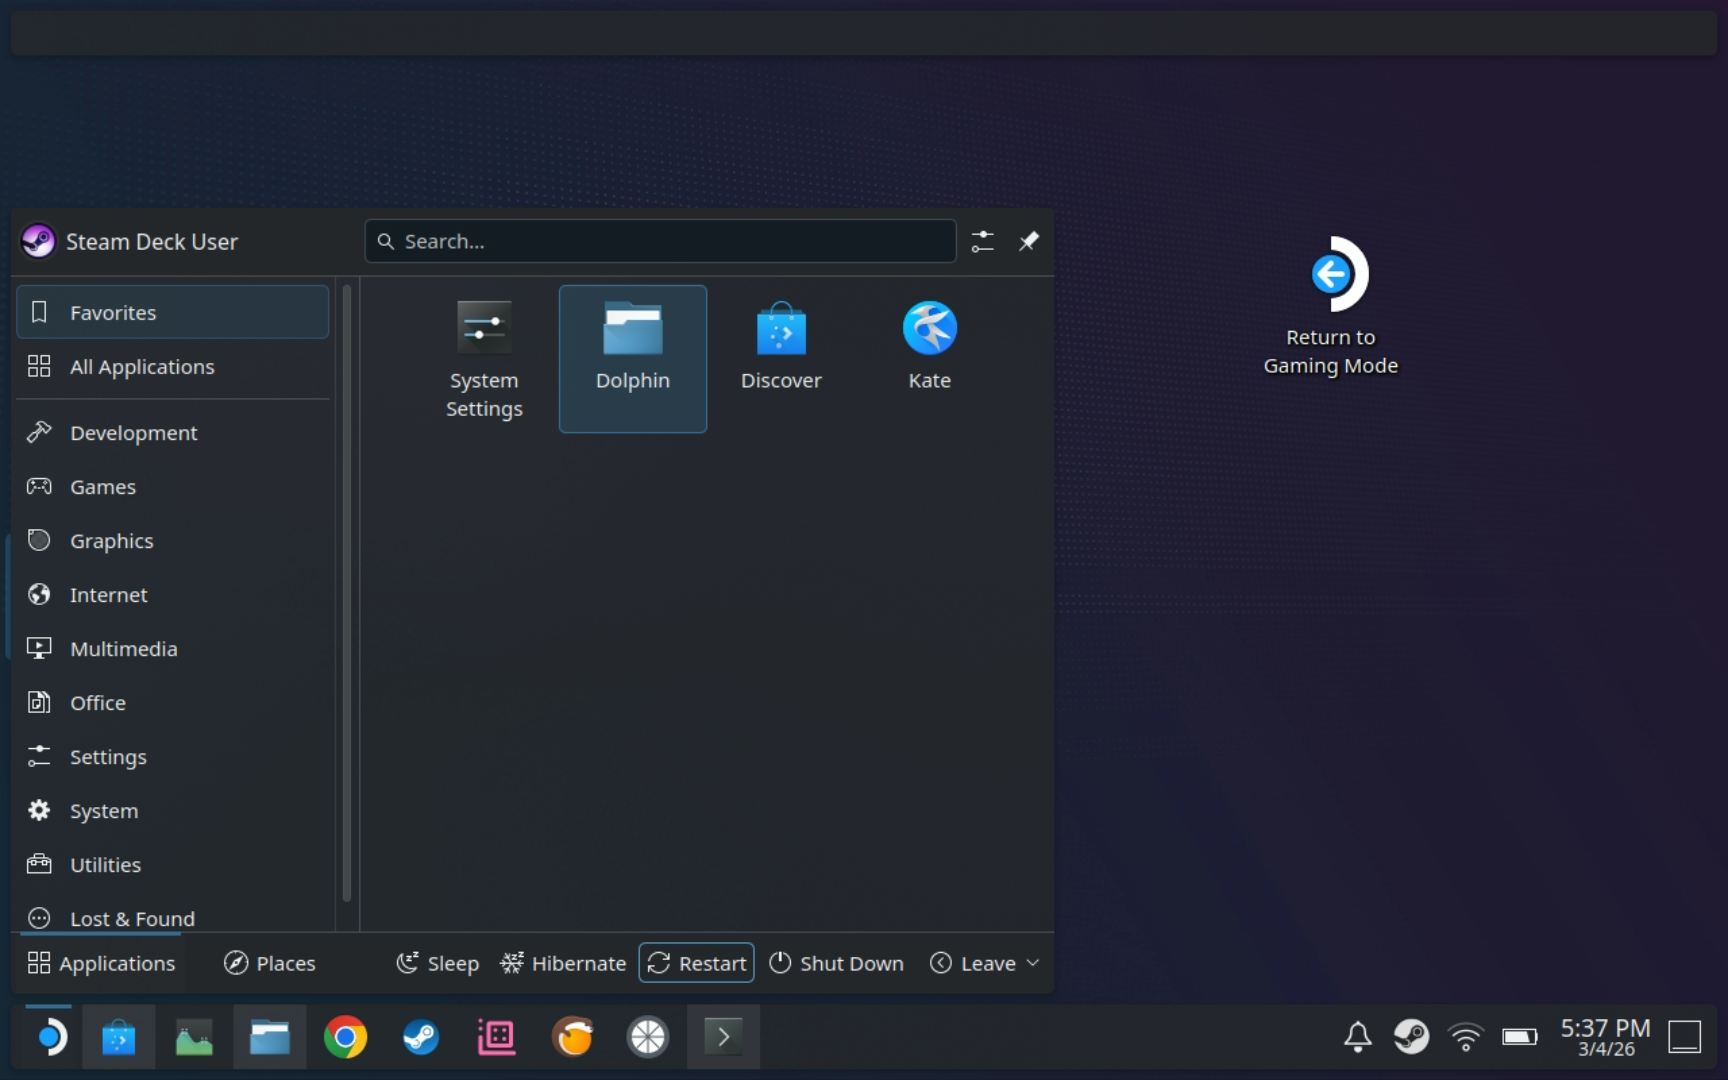
To get back to Game Mode from Desktop Mode, you can either click on the Return To Gaming desktop icon, or you can click on the Steam button in the lower left corner > Restart.
Game Mode vs. Steam Big Picture
While in Desktop Mode, it's very easy to accidentally launch Steam Big Picture mode, especially when pressing the Steam button + X to open the OSD keyboard (since the Steam button alone will launch it).
I find myself doing this constantly. To add to the confusion, it looks exactly like if you restarted in Game Mode.
Big Picture Mode from Desktop is useless, because it's missing many config and performance options. Games launched through here won't use Steam's configurable input layer and instead use the Desktop input settings instead (if it accepts input at all).
If you do this, you need to open the left-side settings (Steam button > Power) and choose Exit Big Picture Mode.
If you ever see Power > Exit Big Picture Mode, you're in Desktop Mode and you need to exit this before launching any games.
Steam On Windows And SteamOS On The Steam Deck
This section is only really relevant if you already have a Steam account, have Steam installed on a Windows PC, and want to connect it to your Steam Deck.
This is encouraged by Valve, but after a lot of experimentation, I would recommend against it, and set up a separate user profile for your Steam Deck instead. The reason for this is simple:
Steam treats every game in your library as if you want access to it from any Steam app instance.
In theory, this is a great idea. In practice, if you have a game installed on your gaming PC and a game installed on your Steam Deck, and you haven't added either one to a collection, then they will both show up in the same Uncategorized list. One will show a Play button and the other will show a Stream button, but there's no way of keeping track of which machine they're on, otherwise.
Why is this a problem? Again, in principle, it isn't. But it doesn't really account for non-Steam games... or for custom artwork that you will apply as you get more into customization. Steam has a tendency to delete artwork for non-Steam games that aren't actively installed on that machine, for some reason.
If you only have ten games and don't care about custom posters, then this is a minor annoyance. But as you build up your library, keeping track of which game is installed where, and reapplying the same artwork over and over, turns into a chore.
If you do want to eventually set up remote streaming between your Steam Deck and a PC, there are other ways to go about this (like Moonlight).
I may add a section on remote game streaming later. For now, unless this is your only Steam-connected gaming device, I suggest setting up a separate Steam profile.
Initial Optimization
Updates
I recommend that you start by applying any available updates:
- Game Mode: Press the Steam button > System > Check For Updates
- Desktop Mode: Open Discover > Updates > Install Updates (in the top right)
VRAM Tweak
The Steam Deck ships with 4GB VRAM, but for some reason it defaults to a 1GB VRAM minimum. For almost all games you will want to adjust this to a 4GB minimum by taking the following steps:
- Completely power off the Deck.
- Press and hold Vol+ and Power for a few seconds, then release both at the same time.
- This should open the UEFI boot menu.
- Navigate to Setup Utility > Advanced > UMA Frame Buffer Size
- Change this to 4GB.
- Save and restart.
Warning
Red Dead Redemption 2 is one of the only games where you want to be on 1GB and not 4GB. Every other game I've tried, not to mention some applications in Desktop Mode, will see a significant performance boost from a minimum 4GB VRAM tweak.
Optimization Tools
From here, you have two options for optimization tools: CryoUtilities or SDWeak. Only install one of them!
CryoUtilities is the easier one-click solution and is extremely safe. SDWeak is a better optimizer, but is a bit more advanced, so the potential for something to go wrong is there.
Installing CryoUtilities
-
Right-click on this link and save the CryoUtilities installer to your desktop: https://raw.githubusercontent.com/CryoByte33/steam-deck-utilities/main/InstallCryoUtilities.desktop
-
Double-click it and click on Continue to start the install. You'll probably need to enter your password once or twice.
-
Once it's done, you'll see some new icons on your desktop: the main CryoUtilities app, an Update icon and an Uninstall icon. Open CryoUtilities and enter your password again.
-
Click on Recommended Settings and let those apply.
-
Click on the VRAM tab and verify what it shows for Current VRAM - which should be 4GB. Once that's confirmed, you're done with optimization.
Installing SDWeak
-
Right-click on this link and save the SDWeak installer to your desktop: https://raw.githubusercontent.com/Taskerer/SDWEAK/refs/heads/main/SDWEAK-installer.desktop
-
Double-click it to start the install. It will load dependencies and then ask for your password.
-
Press 2 for English. SDWeak will take a few minutes to start (on my Deck it was about two minutes where it looked like it wasn't doing anything - just give it time and you'll see it progress eventually.)
-
Go with the default options:
- Install Optimized Kernel: Y
- Set CPU Power Efficiency: N
- Install Uneven Frametime Fix: N
- Install Screen Refresh Rate to 70Hz: N (only applies to LCD, not OLED)
- Apply GPU Driver Optimizations: Y
- Reboot To Apply Changes: Y
-
Boot back into Desktop Mode and as long as you don't see any errors, you're good to go.
Game Mode Optimizations
In Game Mode, the Steam Deck has two different Settings menus:
Steam Menu Settings
Most of what's in here can be left at default or set to your own preferences, but there are a couple to call out:
-
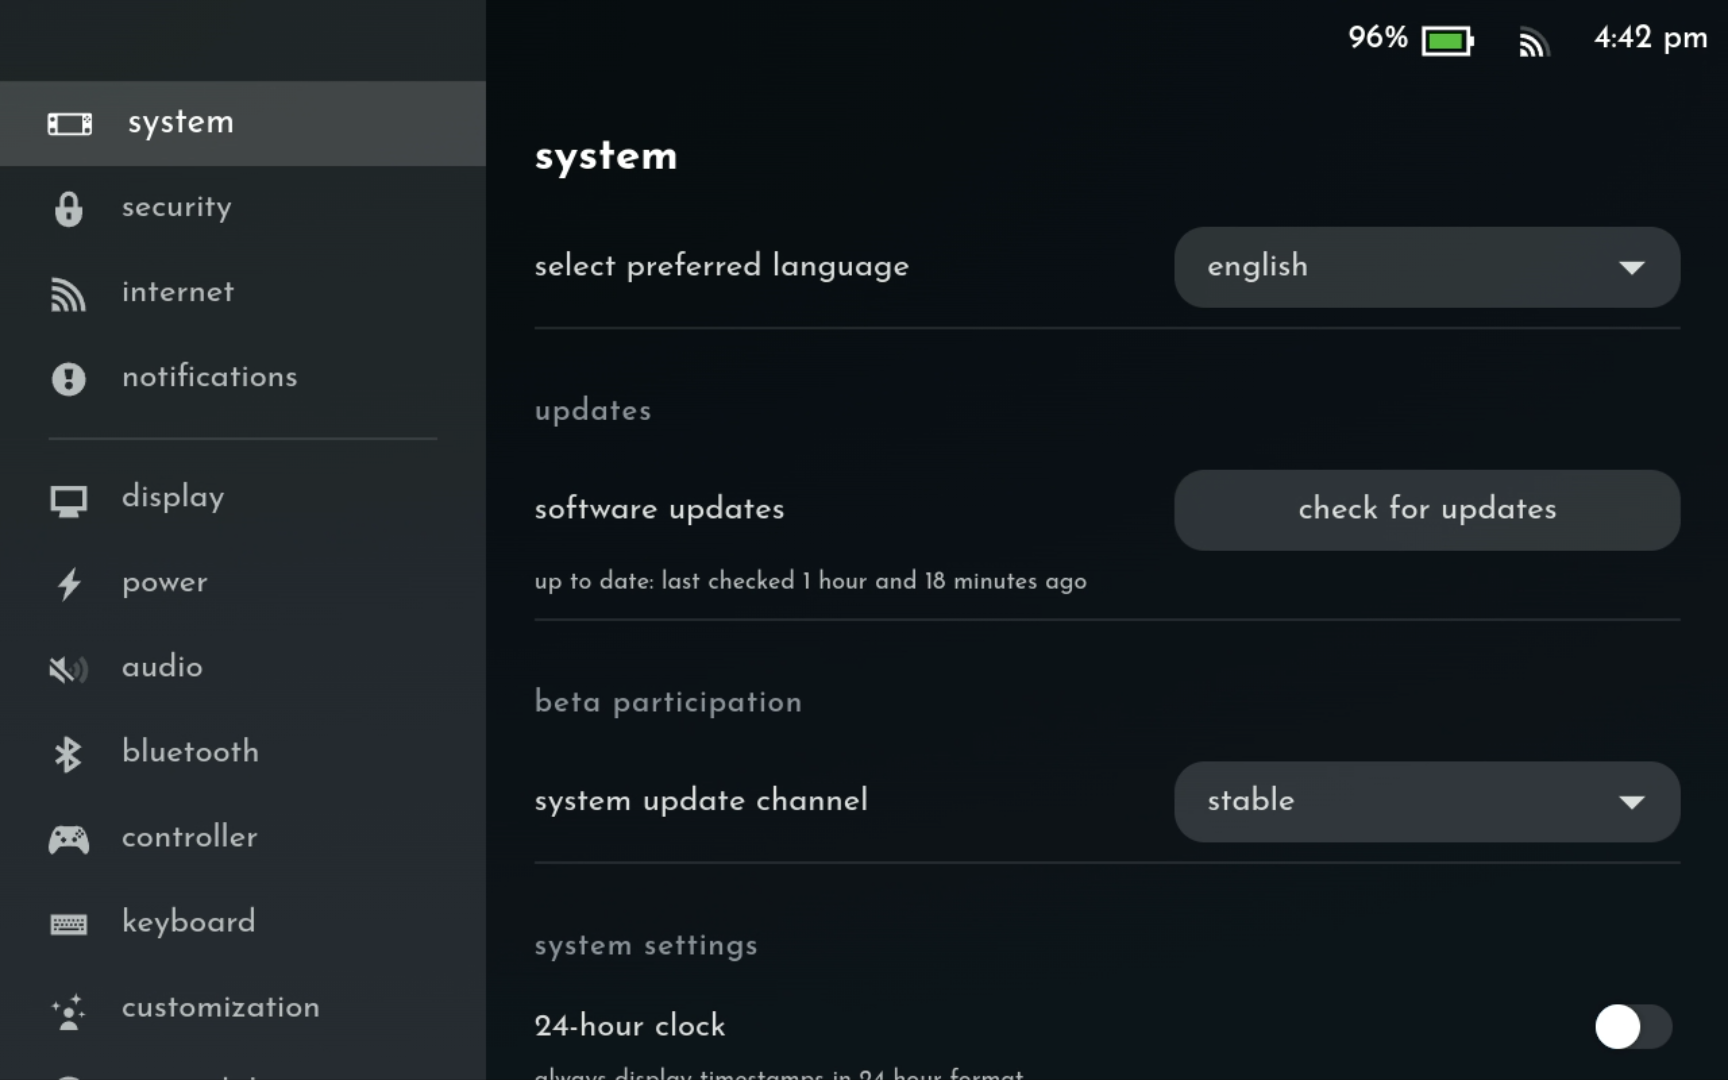
System:
-
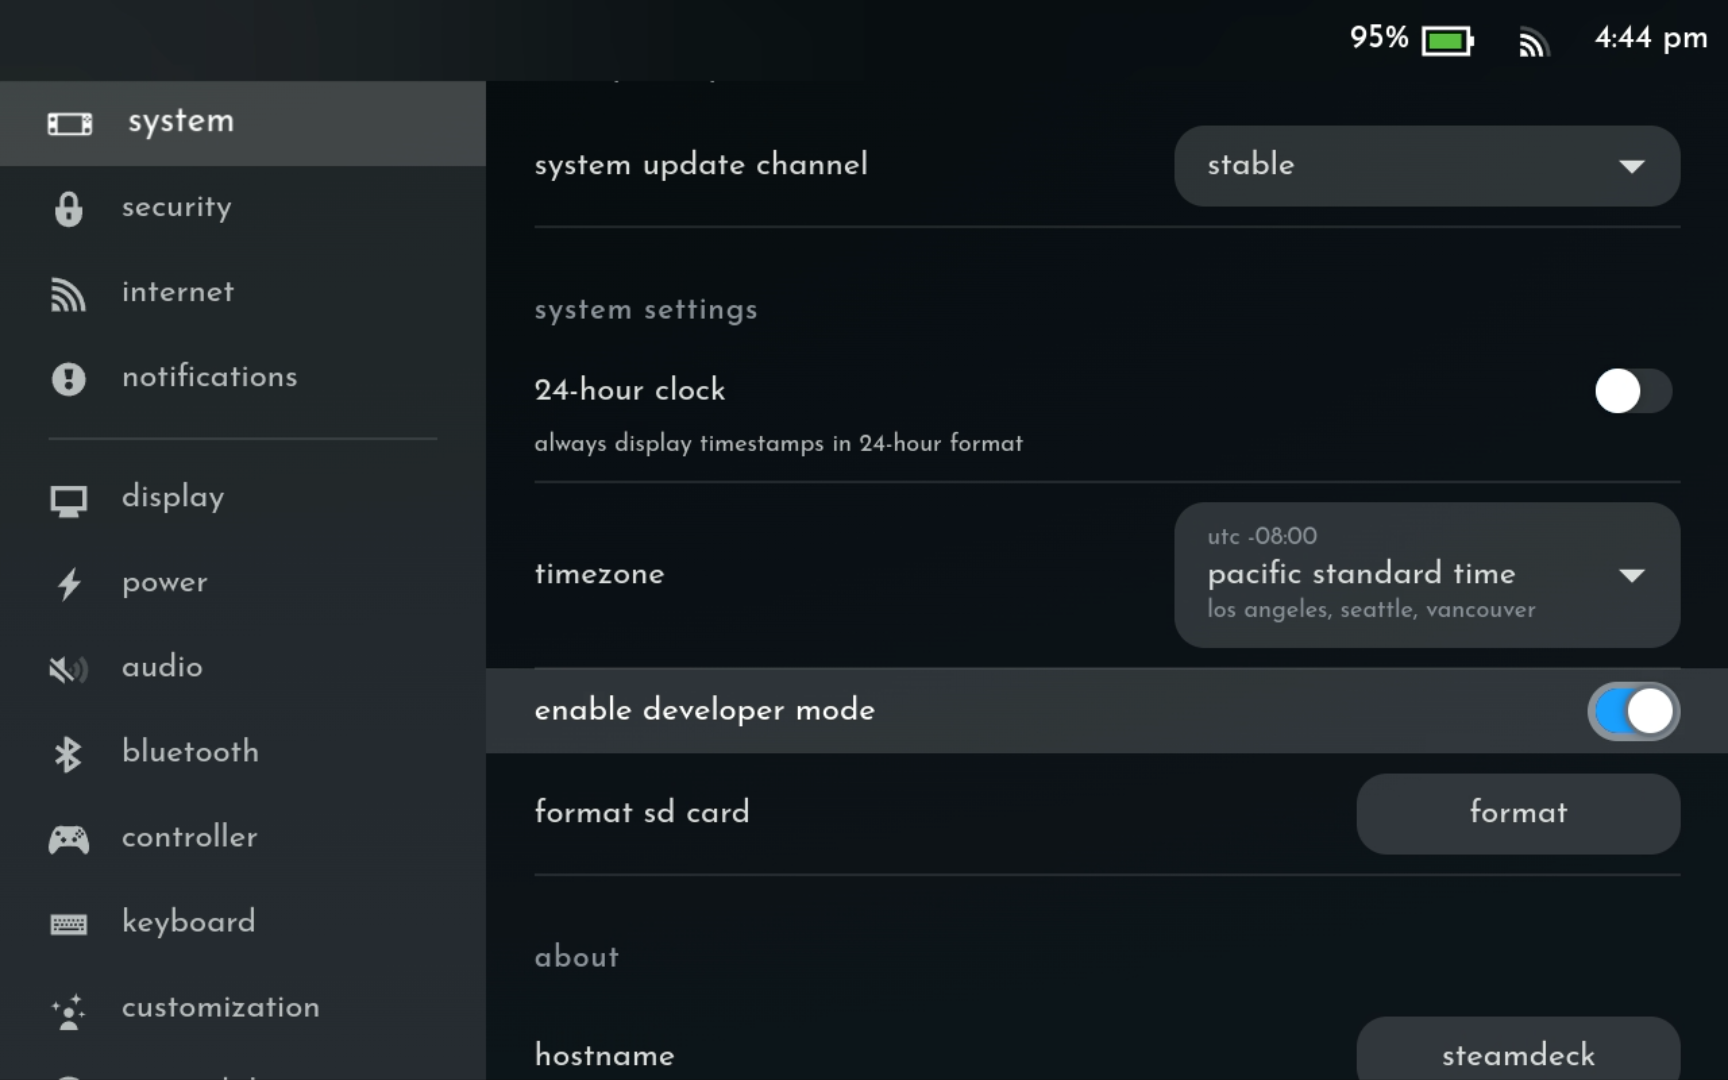
- Beta Participation > Update Channel: Stable
-
Setting this to Beta allows you to get the latest features as they are released, but it can break a lot of later customization settings, so I suggest keeping it off.
-
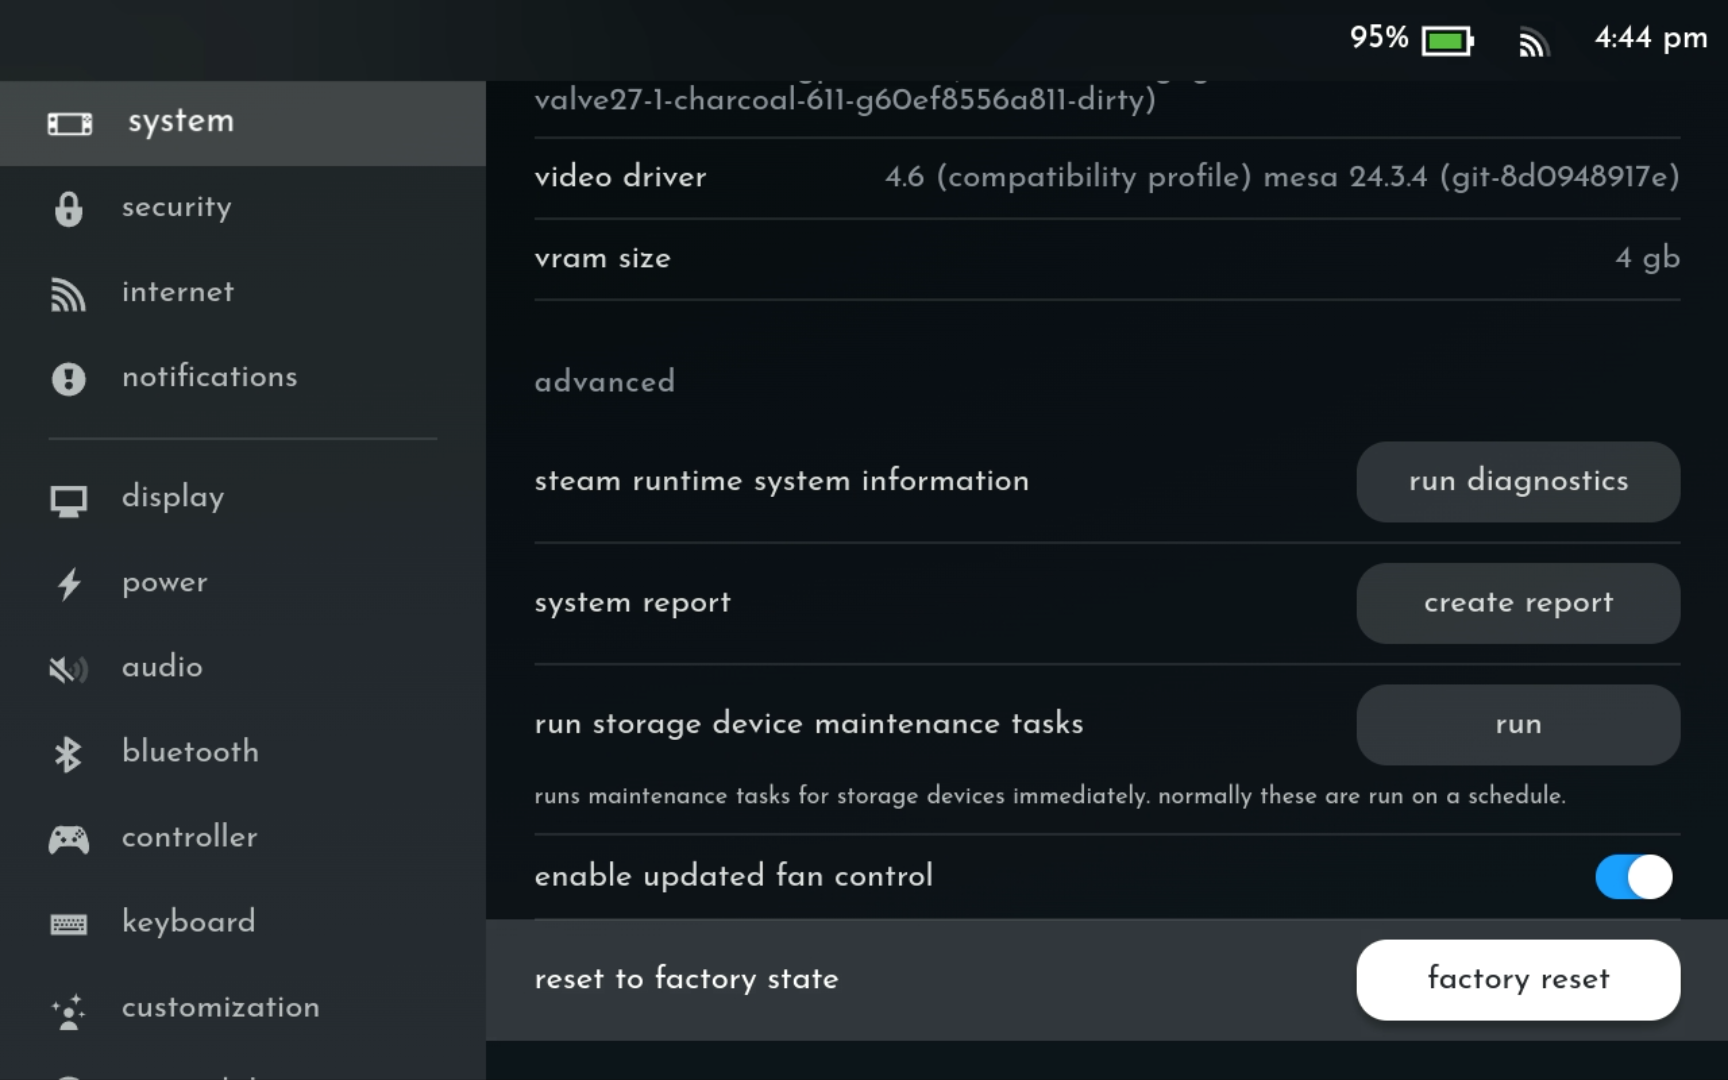
Developer Mode: ON
- Enable Updated Fan Control: ON
-
-
Display:
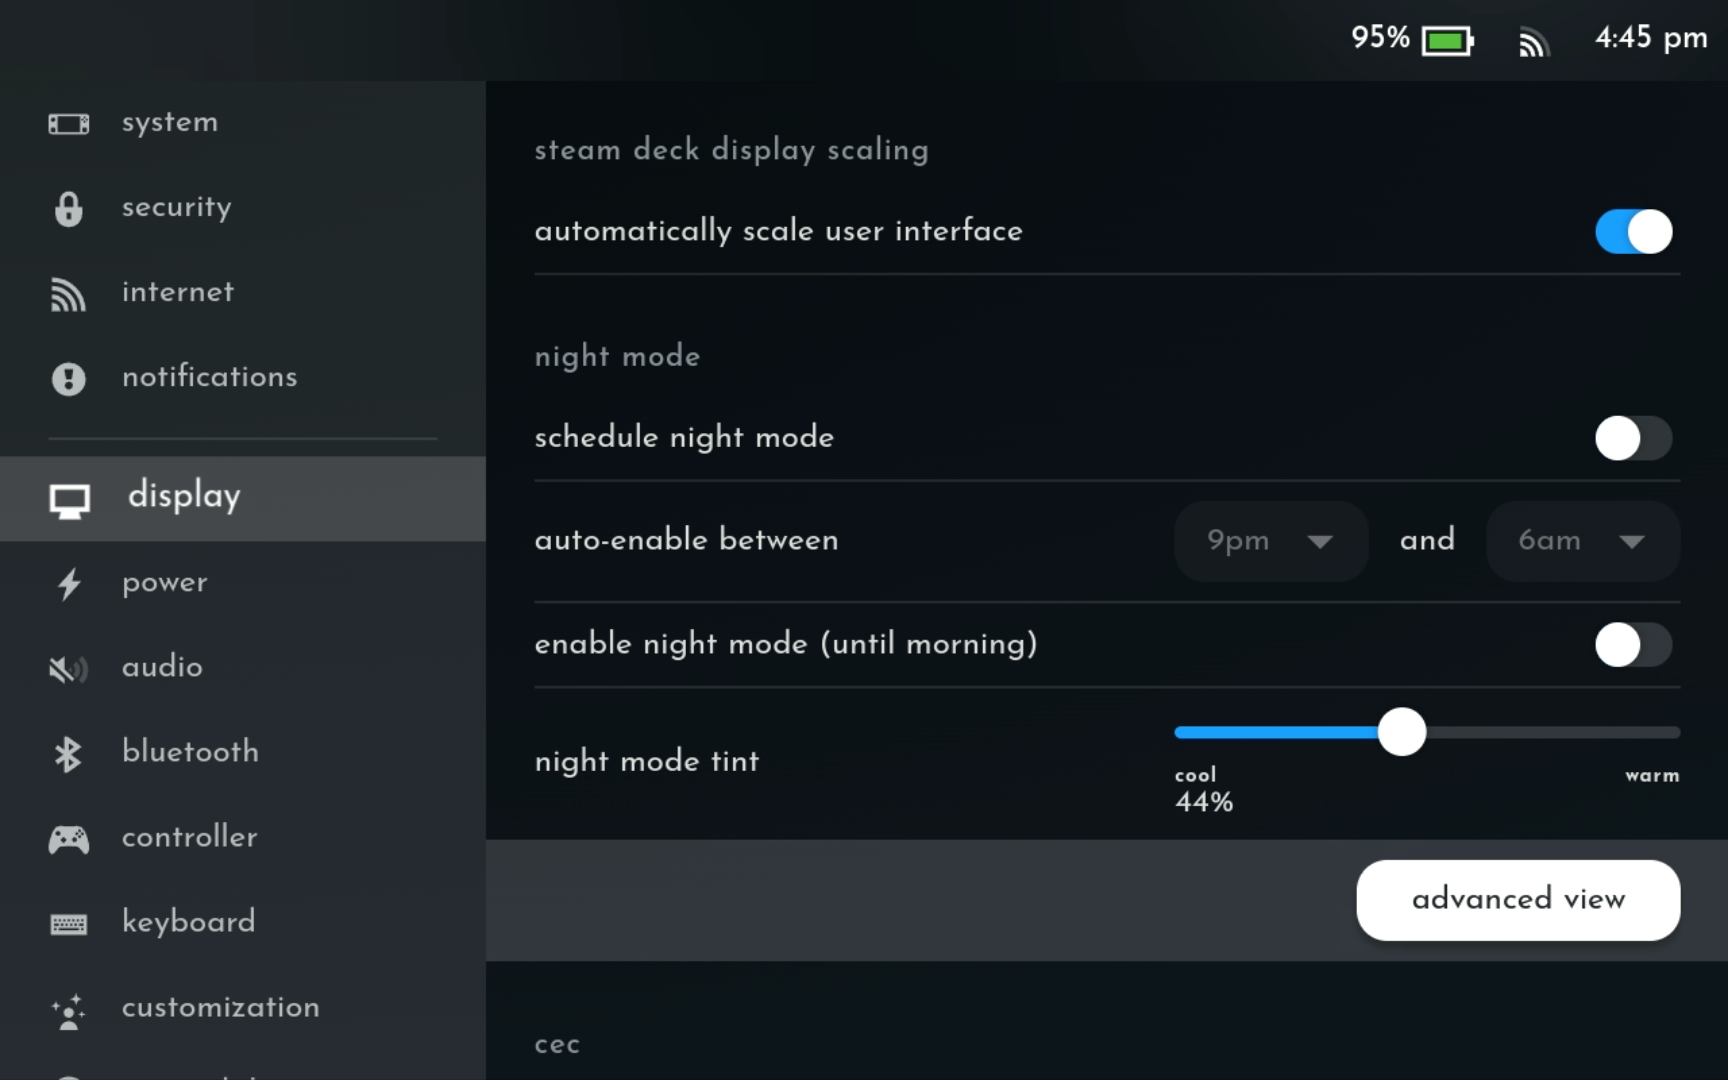
- Automatically Scale User Interface: ON
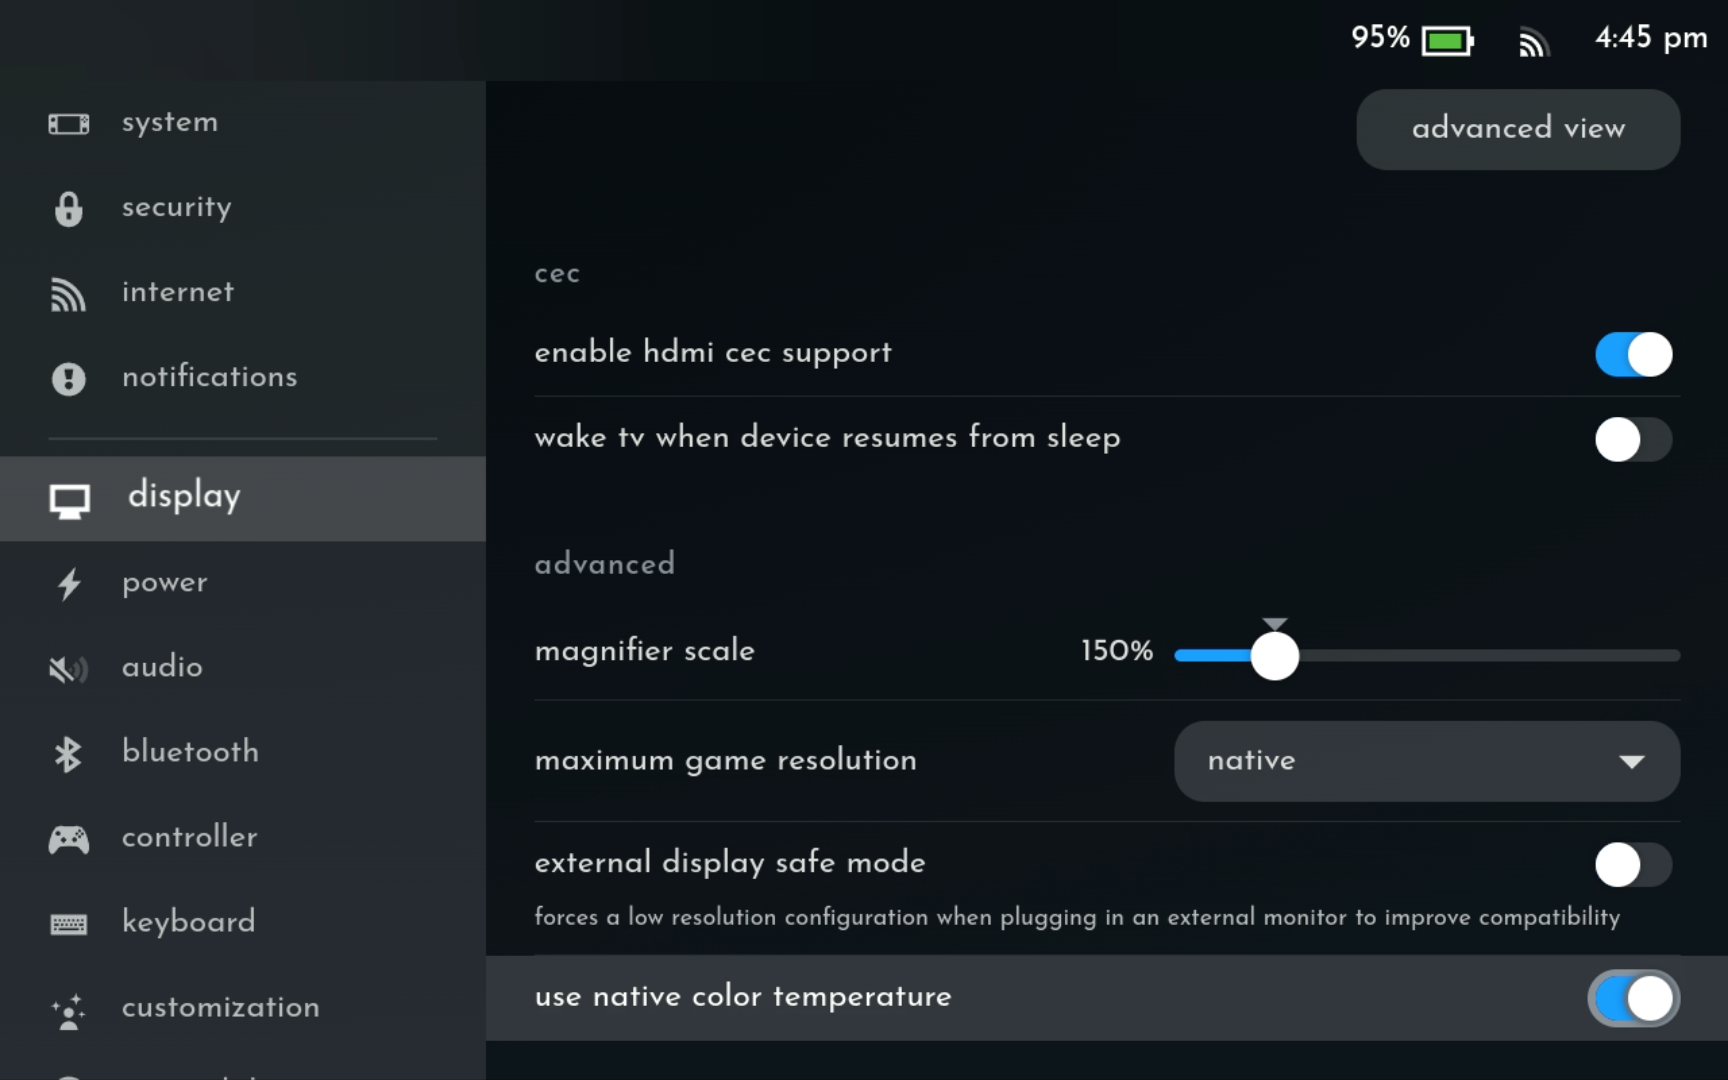
- CEC > Enable HDMI CEC Support: ON
- Maximum Game Resolution: Native
-
- External Display Safe Mode: ON
-
These are all important if you plan on connecting to a TV or monitor. You might also want to bump up the magnifier scale (mine is at 150%). External Display Safe Mode can probably be disabled once you know the Deck is outputting to the TV, but it's a good idea to have it on initially.
-
Power:
-
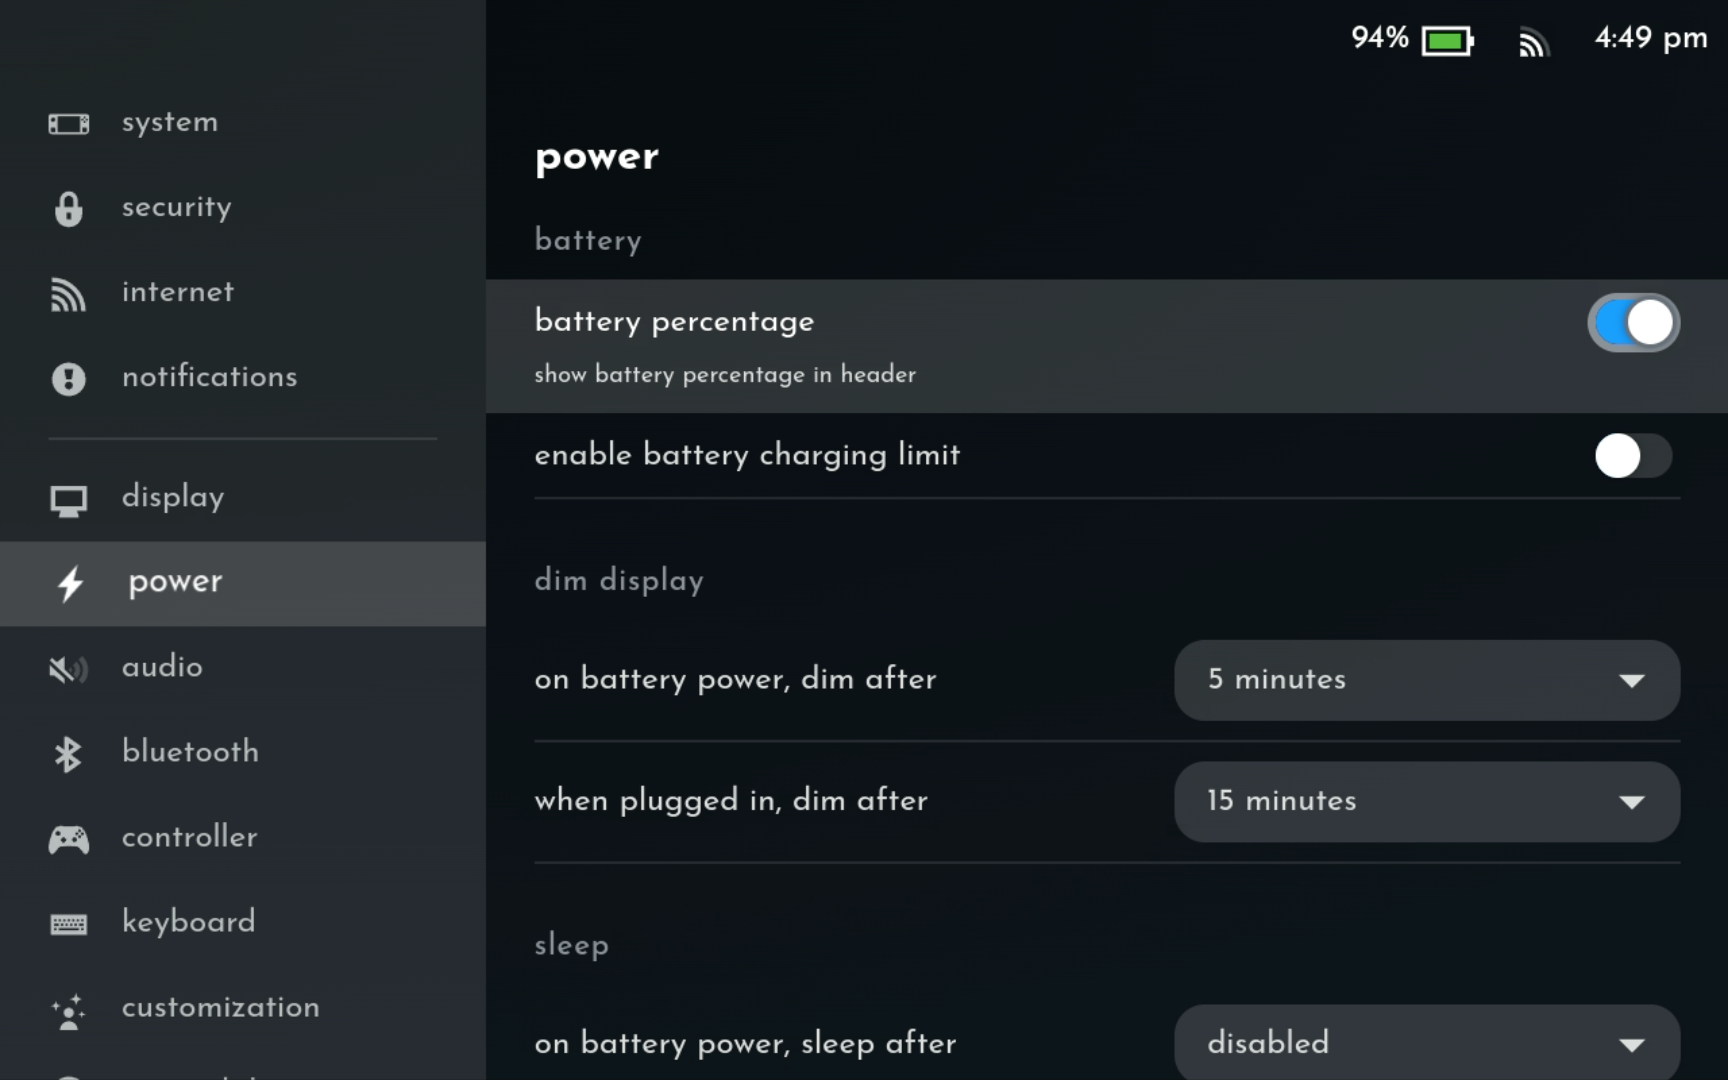
- Battery Charging Limit: OFF
-
This is up to you but I keep it off. When it's on, the Deck will never charge past a certain % (I think 80%) to extend battery life.
-
-
- Controller:
-
SteamOS has extremely sophisticated gamepad\input customization options, and you can connect pretty much any Bluetooth controller or device you want. For now, the only thing that you might need to worry about here is the desktop layout, in case the controls in desktop mode don't work exactly how you want or expect.
-
- Customization:
-
You can change system startup\shutdown movies and game start animations here, but this can be done more easily through Decky Loader which we'll go through later.
-
- Everything Else:
-
Everything below the Accessibility section is Steam-account related, and I won't go through it all here. Honestly I don't use any of these, because for the most part I'm playing non-Steam games where they don't really apply.
Quick Settings
(... button)
Until you install Decky Loader, the main section you'll be concerned with here is Performance (the 4th tab down).
Enabling Performance Options
By default, this will show the Basic View. You will need to select the Advanced View button for the below options to appear.
The Steam Deck has a default All Games performance profile, but you can also start a game, open this section, and flip on Allow Per-Game Profiles. Any changes you then make will only load when that game runs.
Performance Overlay
You can turn on the performance overlay while playing a game to see what kind of framerate you're getting, amongst other details.
Personally, I only find this useful when trying to optimize big, resource-heavy games, and usually only need it at level 1 at most. If you want more details like VRAM usage, core temps and so on, these should be available under higher levels.
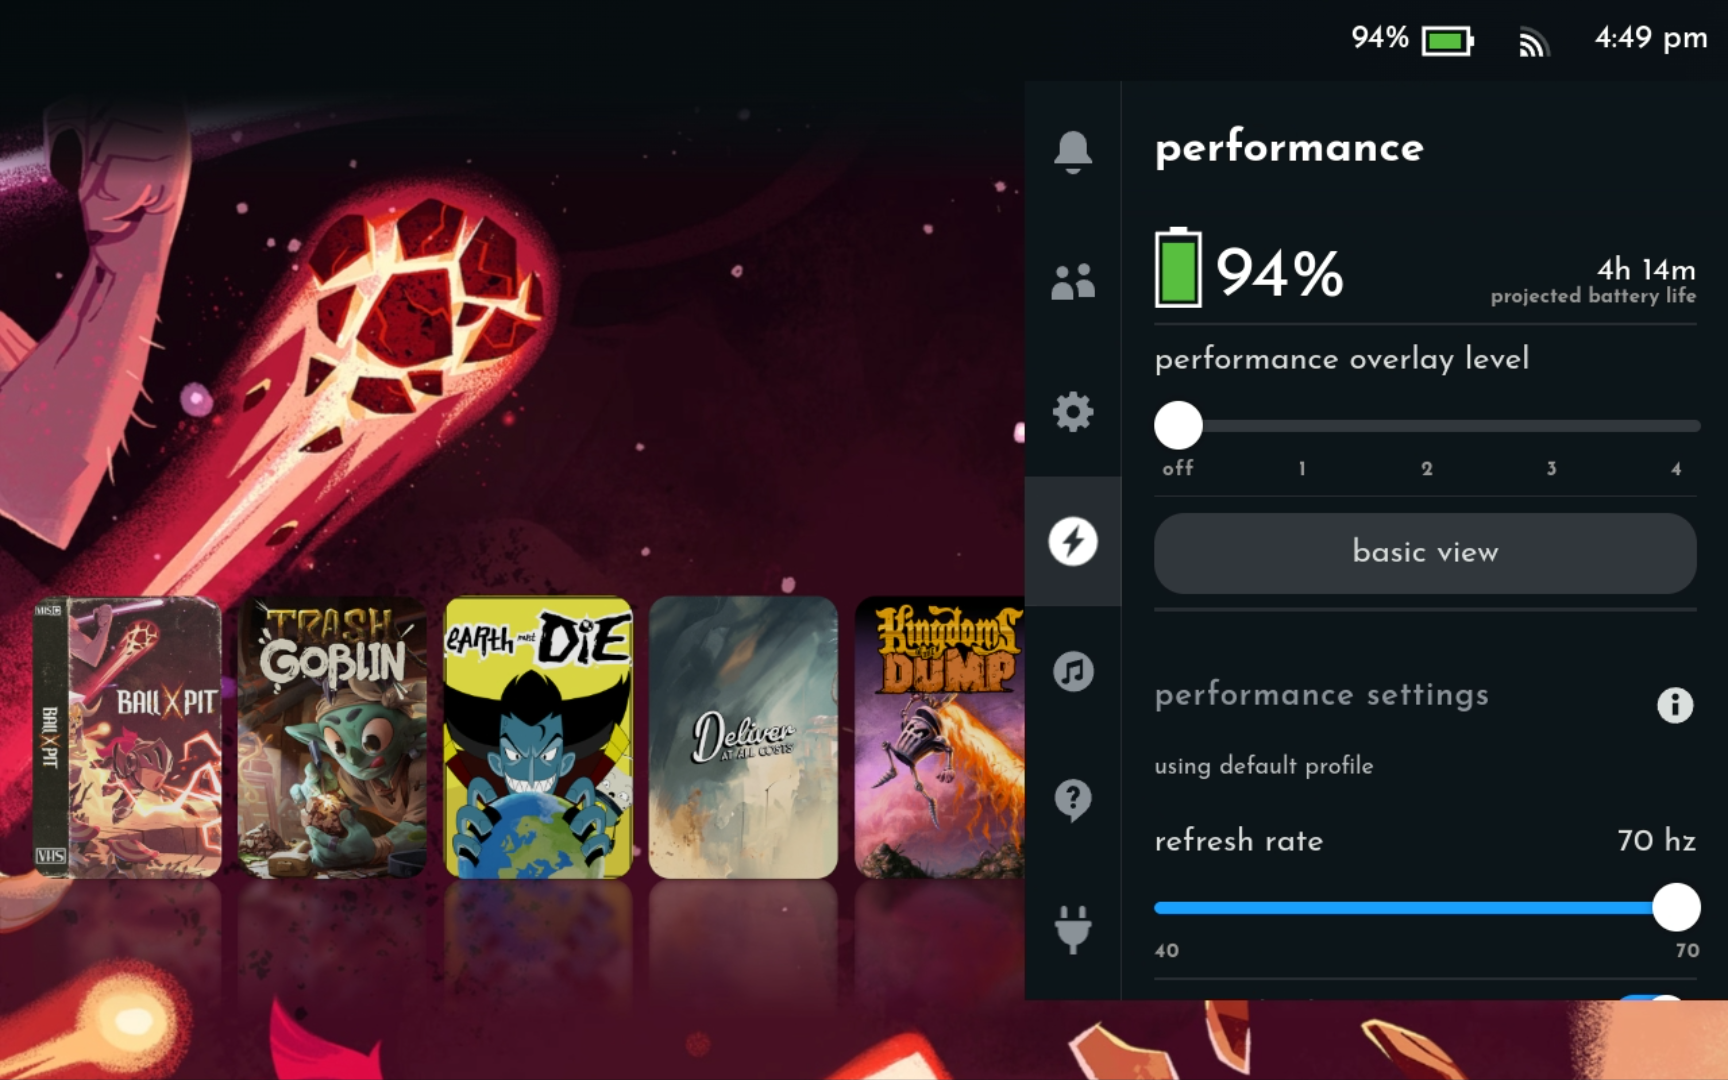
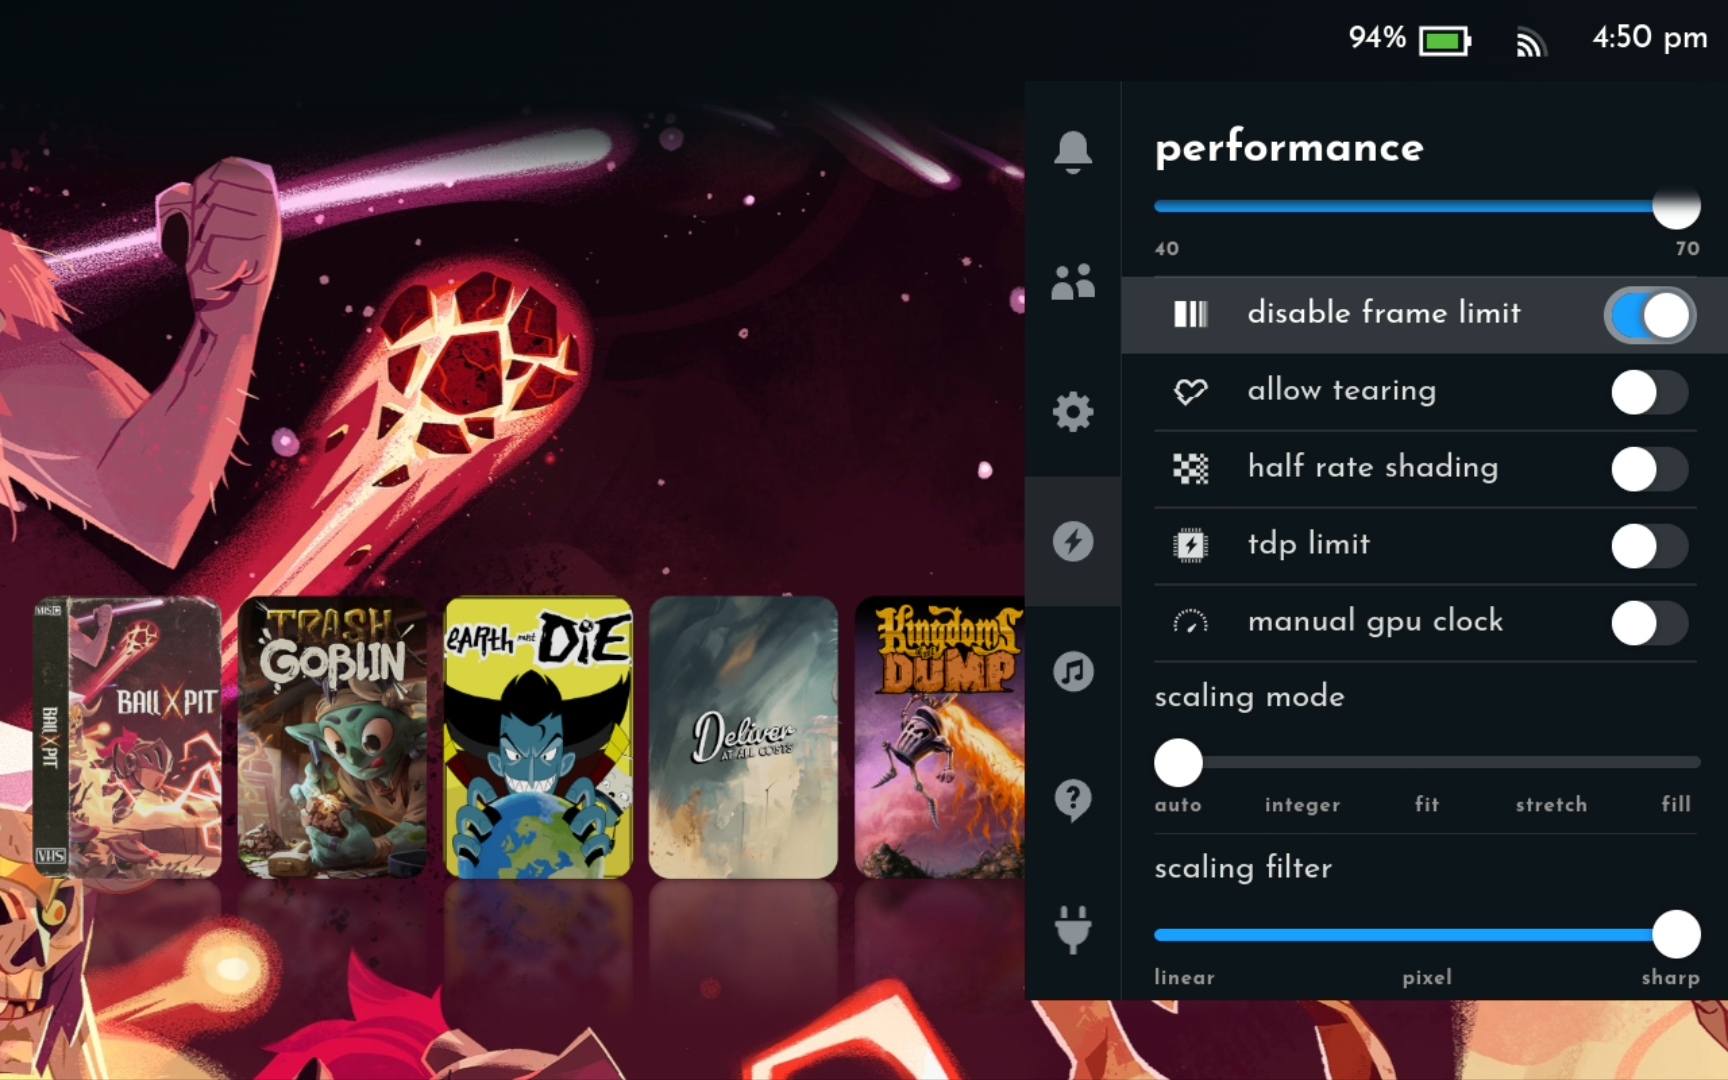
Your default profile should be:
- Refresh Rate: 90Hz
- Disable Frame Limit: ON
- Allow Tearing: OFF
- Half Rate Shading: OFF
- TDP Limit: OFF
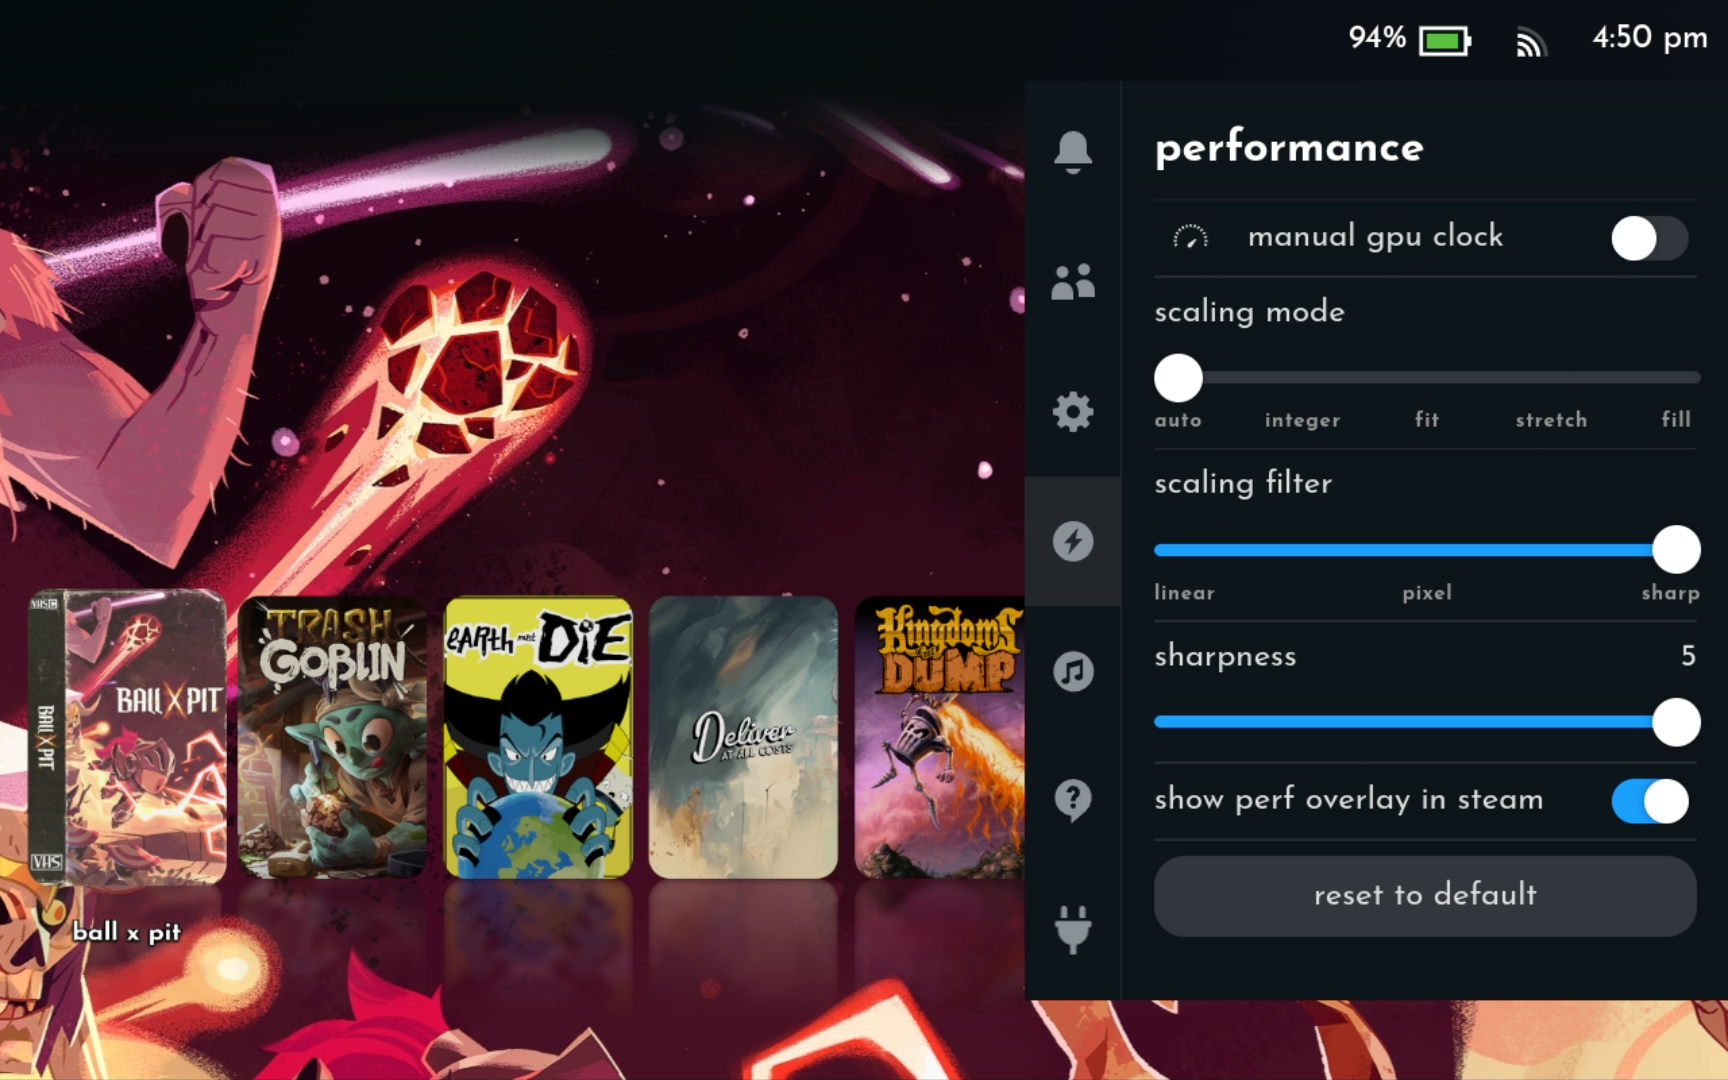
- Manual GPU Clock: OFF
- Scaling Mode: Auto or FSR
- Scaling Filter: Sharp
- Sharpness: 5
Note that some games actually run better with lower TDP or GPU clock settings. There are a few websites you can check for recommended game settings (both Steam Deck Performance and in-game settings):
I may add more to this section later, but for now, as long as you've increased the minimum VRAM to 4GB and installed either CryoUtilities or SDWeak, you're done with optimization.